Pedestrian Trails: Accessible Trail Design & Standards
Photo credit: Louis Arevalo

A guide for trail managers and community members
This page offers practical tips for trail managers and community members seeking to improve access to trail-based recreation for more people, including families, older adults, wheelchair users, and anyone who benefits from easier access. The information provided will help you find the information needed to begin the process of an accessible trail design or improving existing trails and establishing high-quality, ‘gold standard’ pedestrian trails.
Project Phases

Building an accessible trail involves more than construction—it’s a multi-phase process that starts with an accessible trail design trails and ensures that it is environmentally responsible and feasible within budget.
The Professional Trail Builders Association provides these phases of a ‘trail life cycle”:
1. Planning and Feasibility
Start by defining the purpose, need, and feasibility of the accessible trail design project. Use field visits, slope and soil assessments, and community input to identify who the trail will serve and the best possible trail corridors. Avoid sensitive natural or cultural areas and ensure your project aligns with any land management or forest plans in place.
2. Conceptual Trail Plan
Create a conceptual trail plan that identifies a general route, key features, and target design standards like width, grade, and surfacing. This plan helps guide early discussions with landowners, funders, and permitting agencies.
3. Trail Master Plan
The trail master plan builds on the conceptual plan and guides the full development process. It typically includes:
- Delineated Trail Design: Field-flagged and GPS-marked trail alignments with width, height, slope, and structures noted
- Construction Notes: Details on clearing limits, trail tread construction, drainage features, and spoil management
- Permit Compliance Details: Special site conditions or environmental protection measures
- Cost Estimates: Projected costs for construction, maintenance, and permitting, including materials, tools, staff/volunteer time, and any contracted services
The Trail Master Plan ensures your project is feasible, fundable, and ready for permit submission.
4. Permitting and Approvals
Most projects need permits for land disturbance, especially when impacting over one acre or 2–5 miles of trail. Depending on the project, this could include:
- Erosion & Sediment Control (E&SC) permits
- Stormwater Pollution Prevention Plans (SWPPP)
- Wetland or stream crossing approvals
- NEPA reviews (for federal projects)
- Army Corps of Engineers permits (for work near wetlands or waterways)
Permitting can take 2 to 6 months or longer, depending on scope and local regulations.
5. Construction
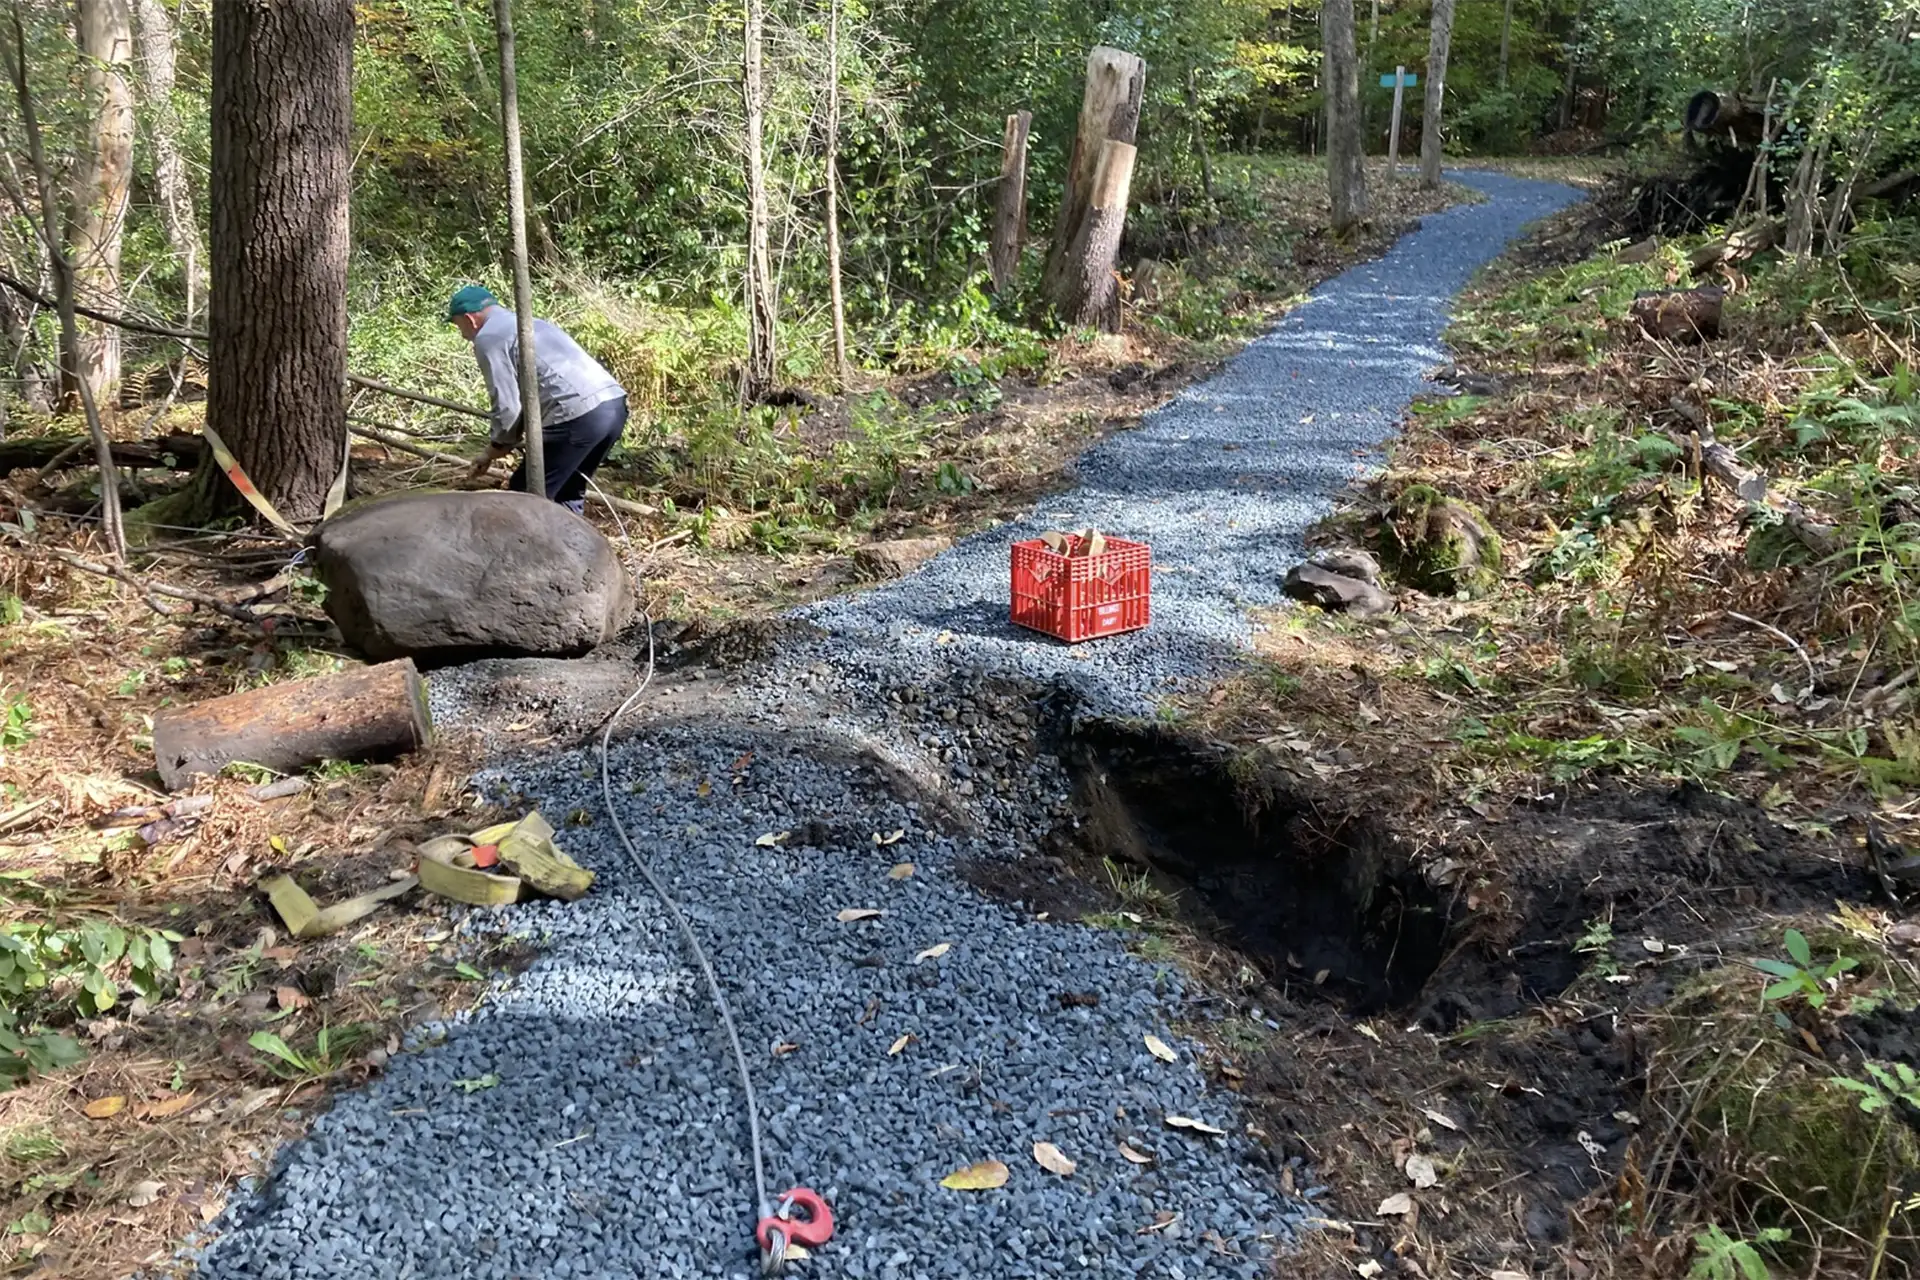
Once permits are secured, build the trail according to the master plan and permit requirements. Use field-delineated trail designs to guide work on the ground. Install erosion controls, follow best practices for grading and surfacing, and maintain environmental protection throughout construction. Many projects use a combination of hand tools and mechanized equipment, especially for tread shaping and backslopes.
Looking for a trail builder? Check out the Professional Trail Builders Association.
6. Maintenance and Management
Well-built accessible trails reduce long-term maintenance, but routine upkeep is still essential. Key trail maintenance tasks include:
- Clearing vegetation
- Maintaining trail tread and drainage features
- Inspecting structures like bridges or boardwalks
- Monitoring erosion or washouts after heavy storms
A trail management plan or trail maintenance protocol can help land managers plan for regular assessments and upkeep, keeping the trail safe and enjoyable for all users.
Recommended Resources
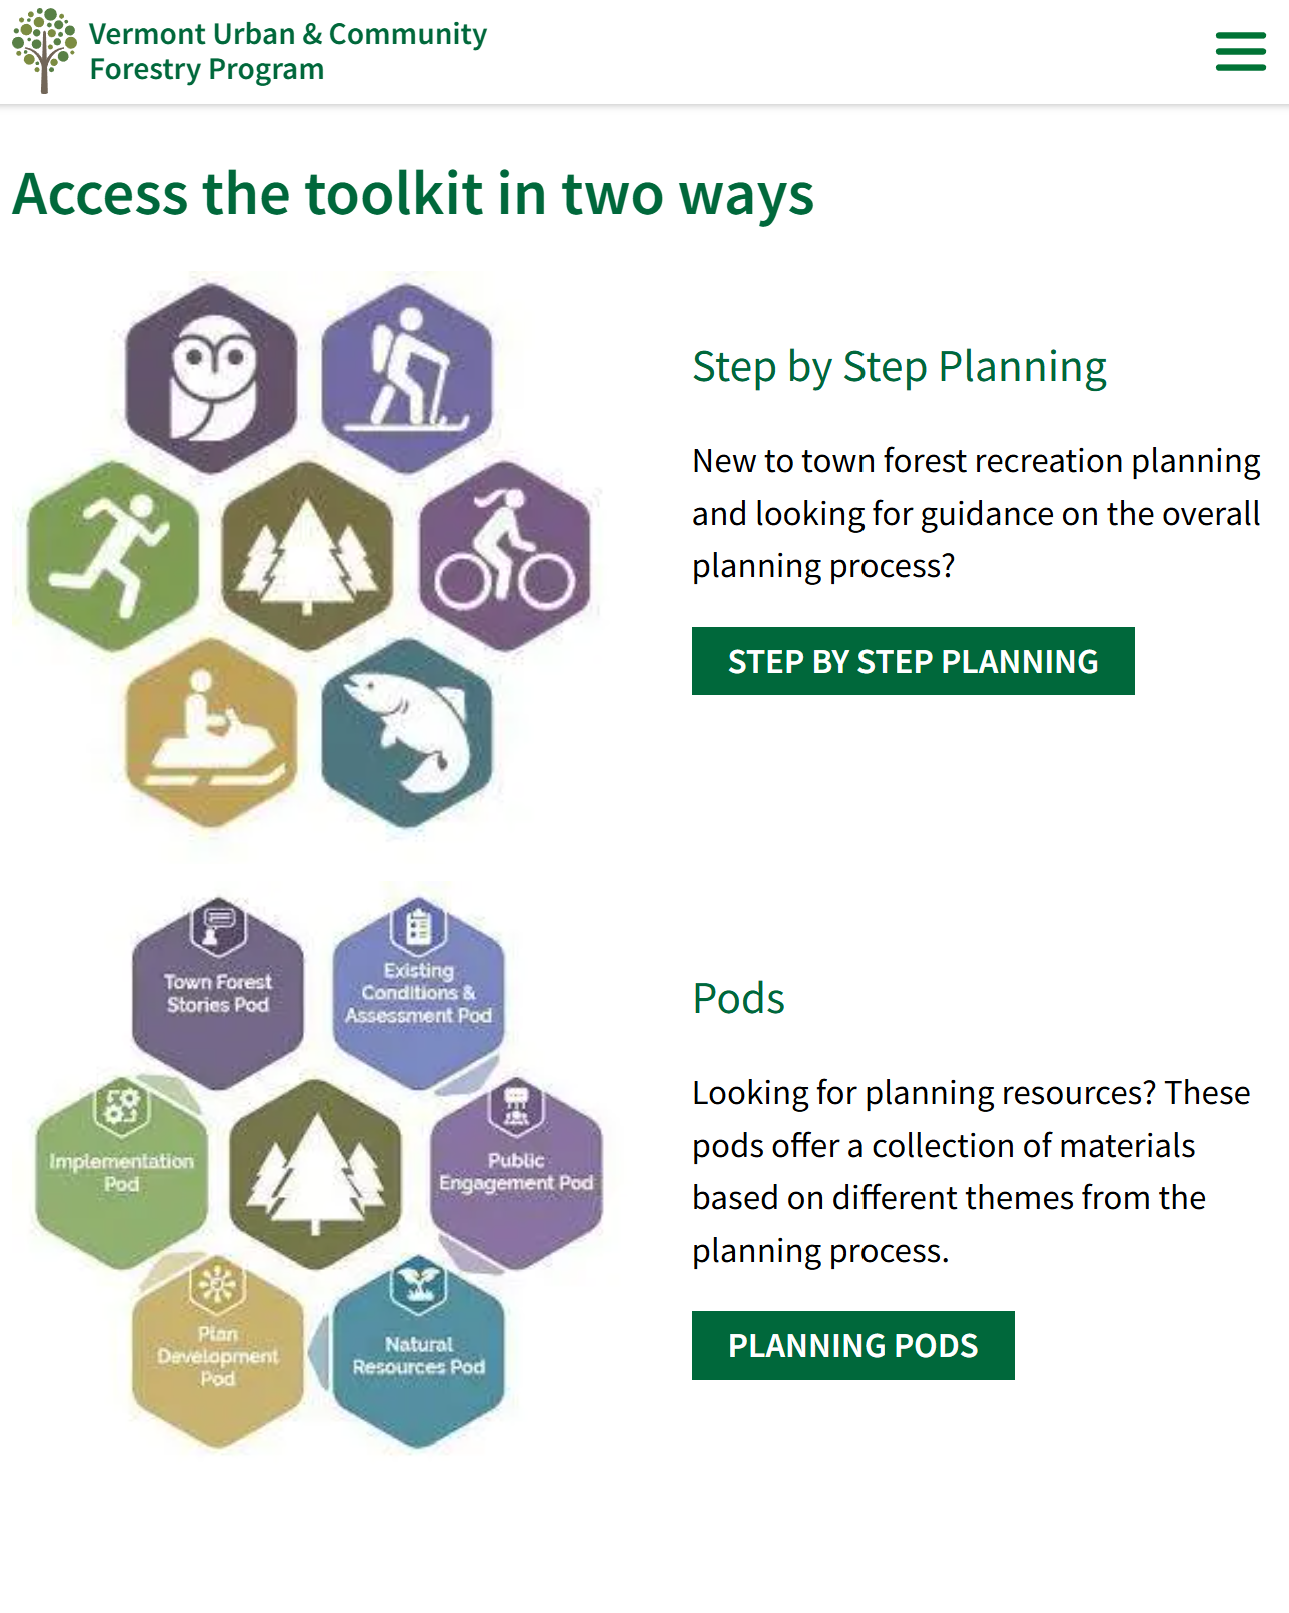
Check out Vermont Urban and Community Forest’s Toolkit, which includes detailed information on how town-based groups can engage stakeholders, design, and plan for public trails.
See our trail-builder page for essential questions to ask your builder, tips for finding a trail building company, and guidance for those interested in becoming a trail builder.
Design Best Practices
While many resources offer best practices for improving trail accessibility, the two nationally recognized ADA accessible trail guidelines below define the gold standard for accessible pedestrian trails.
Building a fully compliant trail can be costly and complex. Still, increasing the number of truly accessible trails is essential to ensure everyone has more options, regardless of ability. Even without full compliance, many trails can be greatly improved and made more usable by a wider audience.
Outlined below are best practices from the following resources:
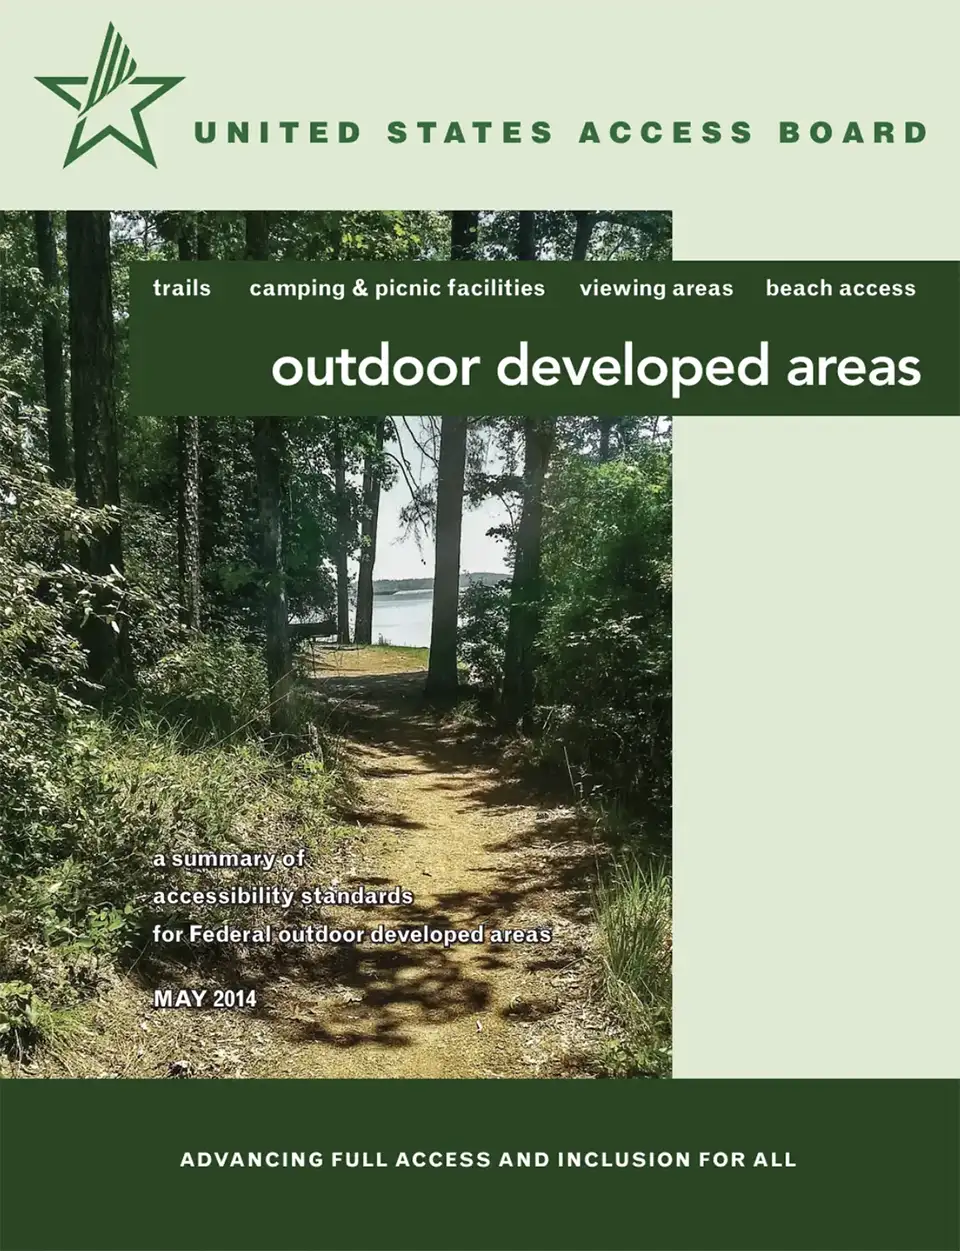
Access Board Guidelines: National guidance applying ADA/ABA principles to outdoor spaces with easy-to-follow diagrams and examples.
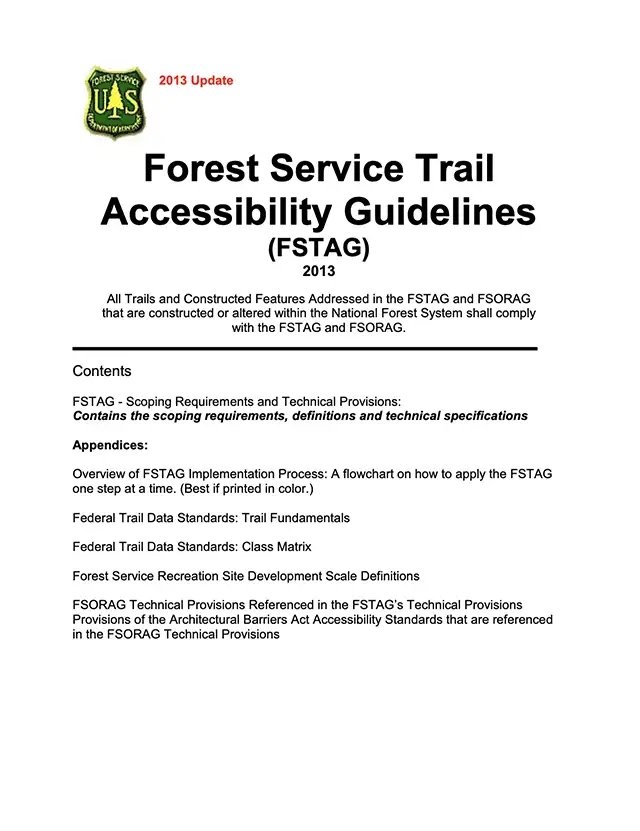
U.S. Forest Service Trail Accessibility Guidelines (FSTAG): Used on federal lands, offers detailed standards on trail width, slope, surfaces, and more. Click here for the pocket version.
What the Accessible Trail Design Gold Standard Looks Like
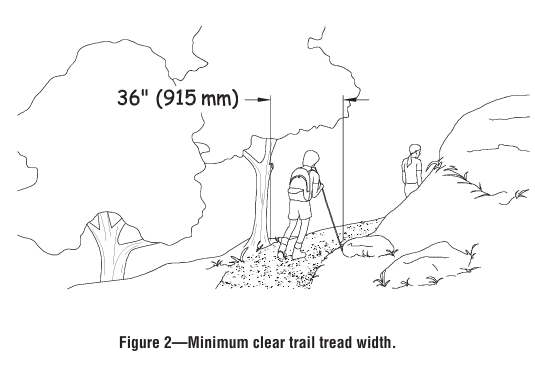
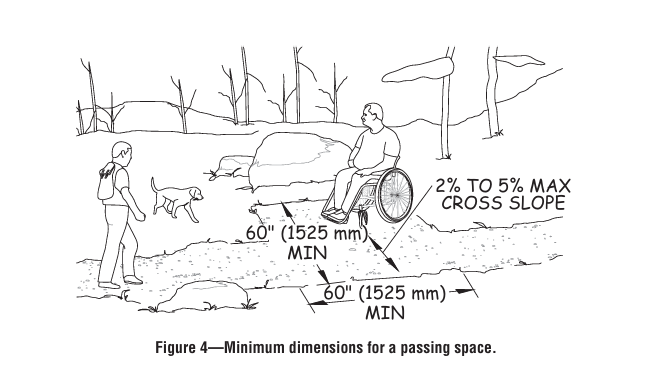
Trail Width
Minimum width: 36 inches with 5-foot-wide (60 inches) passing areas required every 1,000 ft. See figure 2 and 4 from the Access Board Guidelines.
Trail Slope and Grade
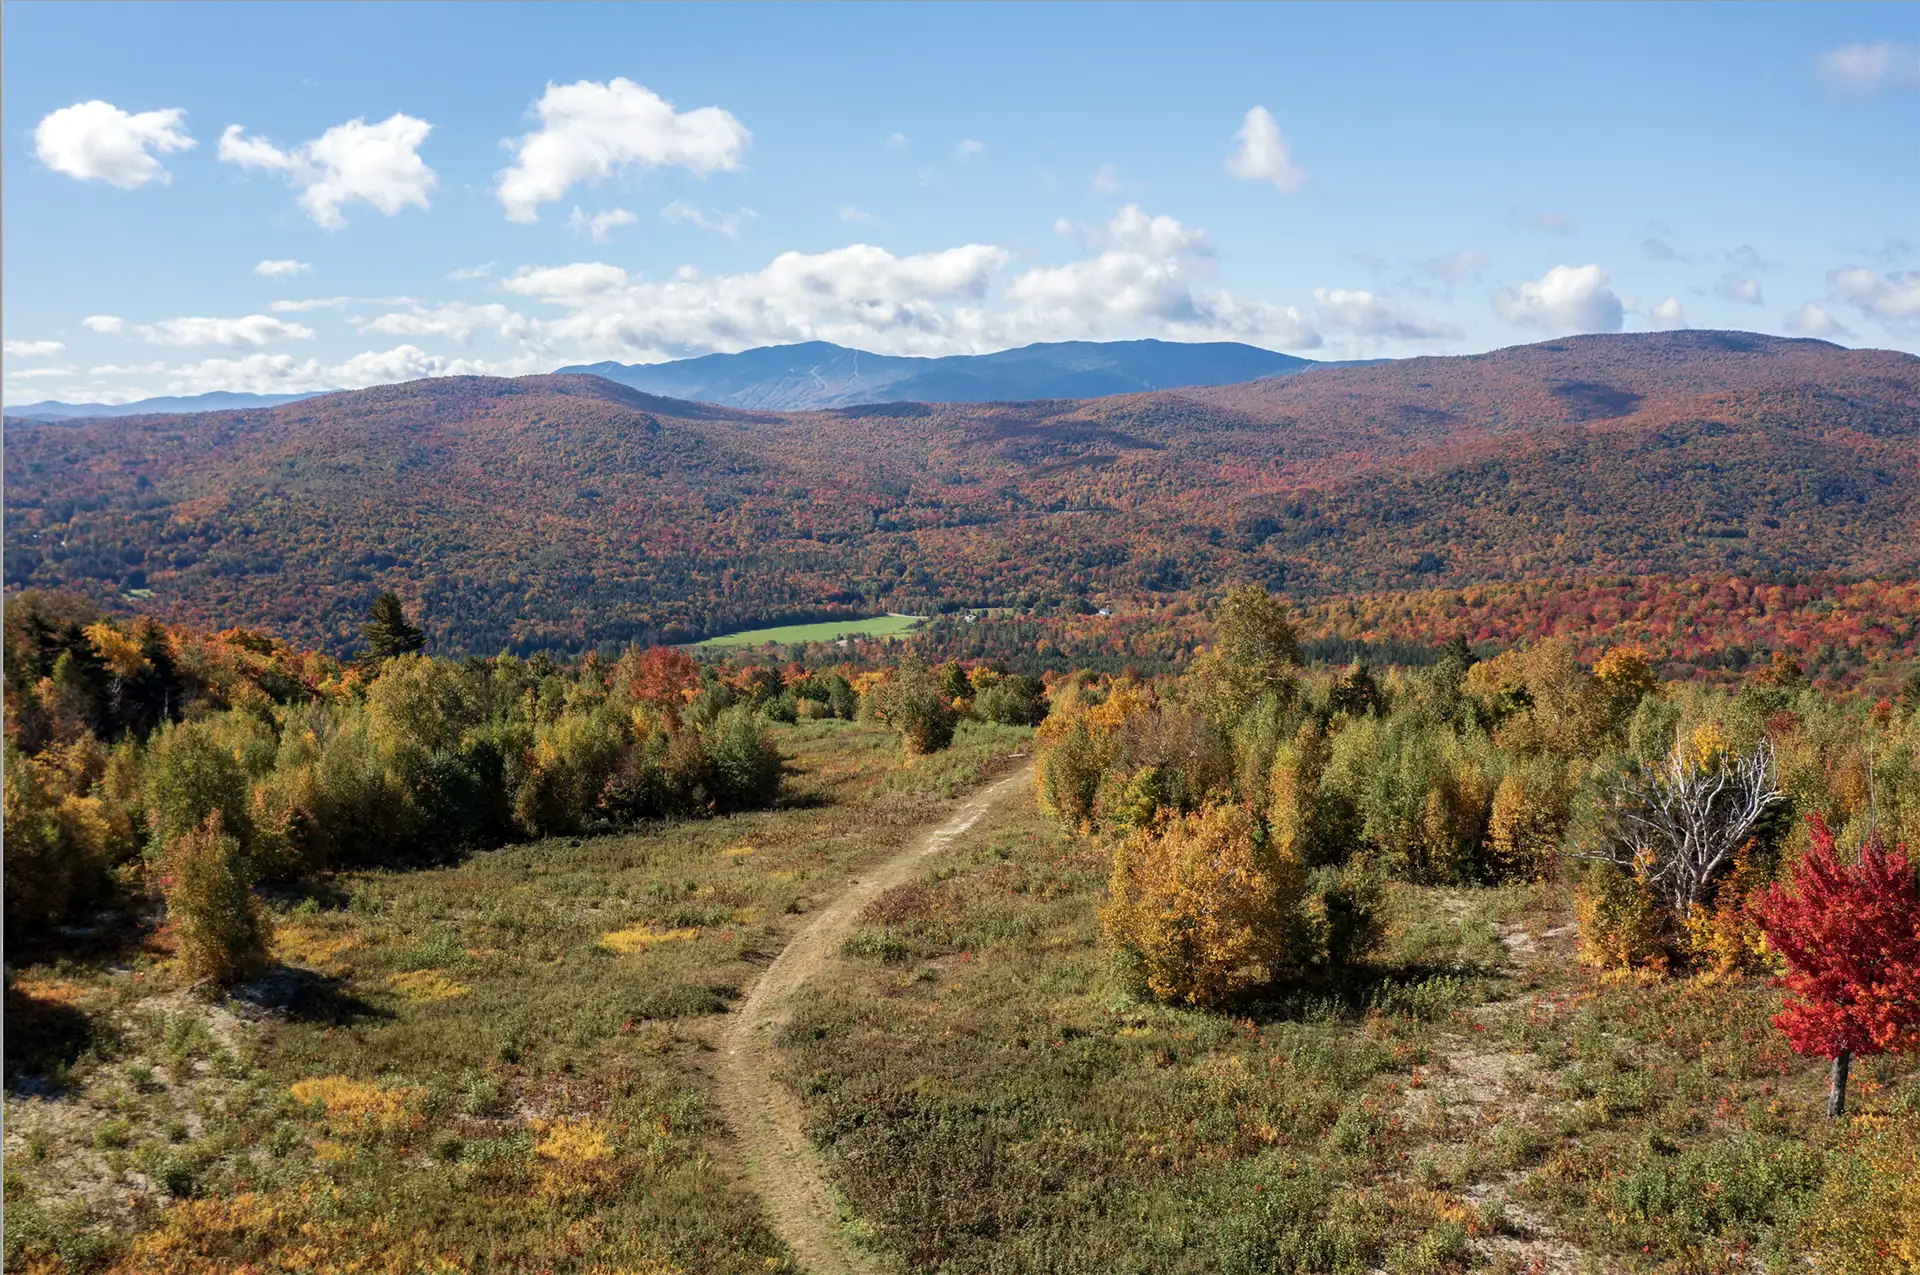
Grading is one of the most important considerations when designing trails for accessibility. A first step is to assess the site’s natural terrain and determine if it can accommodate an accessible trail without major disruption. A topographic survey, which includes structures, large trees, wetlands, stone walls, and water bodies, helps guide route selection and serves as a valuable design tool.
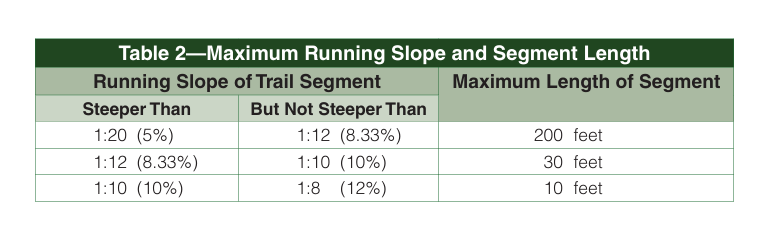
For grading, the U.S. Forest Service Trail Accessibility Guidelines (FSTAG) offer the most commonly referenced standards. These are more flexible than ADA standards for access routes, which require slopes of 5% or less (1:20) without handrails.
Under FSTAG, slopes are allowed to increase in short segments, provided rest intervals are included (see table 2 below):
- ≤ 5% (1:20): Unlimited distance without rest intervals.
- > 5% to ≤ 8.33% (1:12): Allowed up to 200 feet between rest areas.
- > 8.33% to ≤10% (1:10): Allowed up to 30 feet between rest areas. Per ABA guidelines, no more than 30% of the trail’s total length may exceed an 8.33% slope.
- > 10% to ≤ 12% (1:8.33): Allowed up to 10 feet between rest areas.
- Above 12% is not permitted under FSTAG.
This flexibility allows for accessible routes through more varied terrain while maintaining usability for people with mobility devices. Rest intervals should be designed to allow space for seating or wheelchairs, with gentle slopes and firm, stable surfaces.
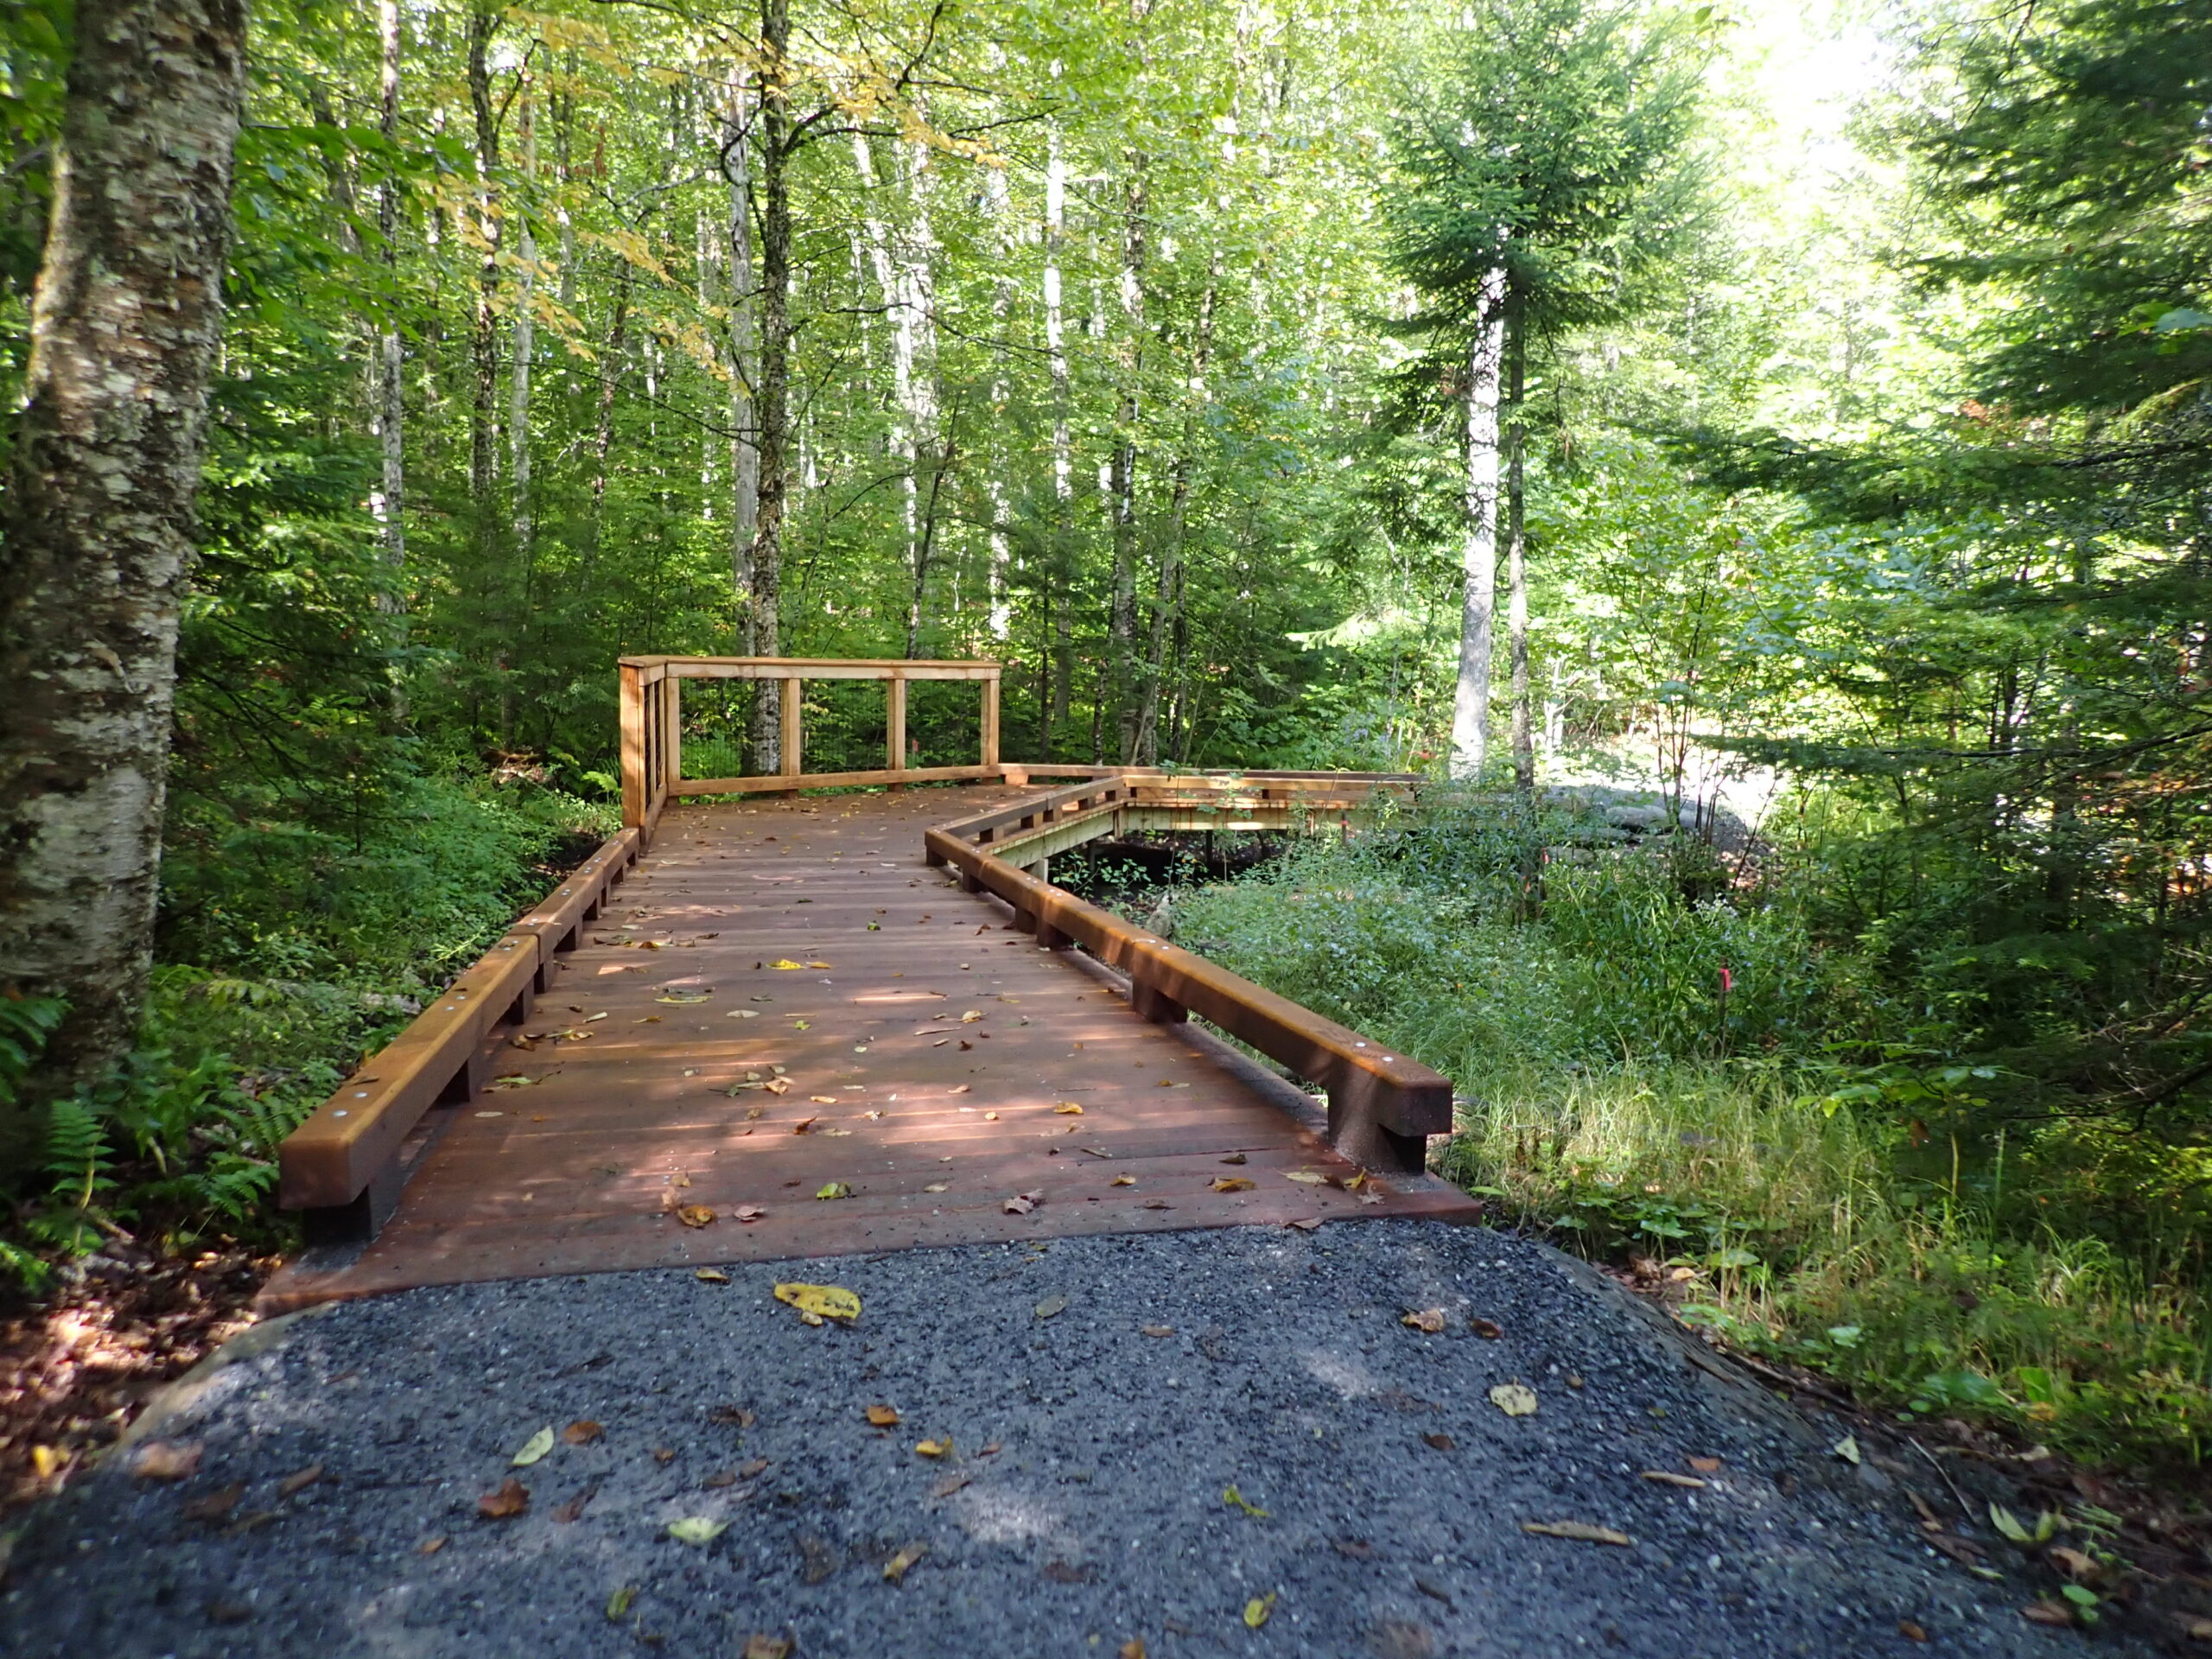
Surface Materials
- Preferred: Hardened multi-layer surfaces such as compacted hardpack, using:
- Excavation to mineral soil
- ¾” crushed stone base
- Geotextile cloth to prevent vegetation intrusion
- Fine hardpack top layer (e.g., bluestone) for stability
- Alternative options: Asphalt may be used, but it is not required. Grass or dirt may be used but typically require more upkeep and offer less consistent access.
Drainage
- Build with a slight outslope toward the natural low side to shed water efficiently—avoid crowning, which can make wheelchair travel harder.
Prioritized Trail Features
Creating an accessible trail means considering the entire user experience from parking lot to viewpoints:
- Parking Areas:
- Provide handicap parking spaces as close as possible to the trailhead, with firm, stable, slip-resistant surfaces—even if the rest of the lot is a different material.
- At minimum:
- Car spaces must be 8 feet wide with an adjacent 5-foot-wide access aisle.
- Van-accessible spaces must be 11 feet wide with a 5-foot access aisle, or 8 feet wide with an 8-foot access aisle (preferred in Massachusetts).
- Surface slope must not exceed 2% in any direction for safety and stability.
- Each space must be clearly marked with the International Symbol of Accessibility, and van spaces must include a “Van Accessible” sign.
- Where possible, provide a designated drop-off zone with direct access to the trailhead via a curb ramp or level surface.
- Ensure there are no steps or barriers between the parking area and the trail entrance. The connection must meet accessible route standards, including minimum width, slope, and surface requirements.
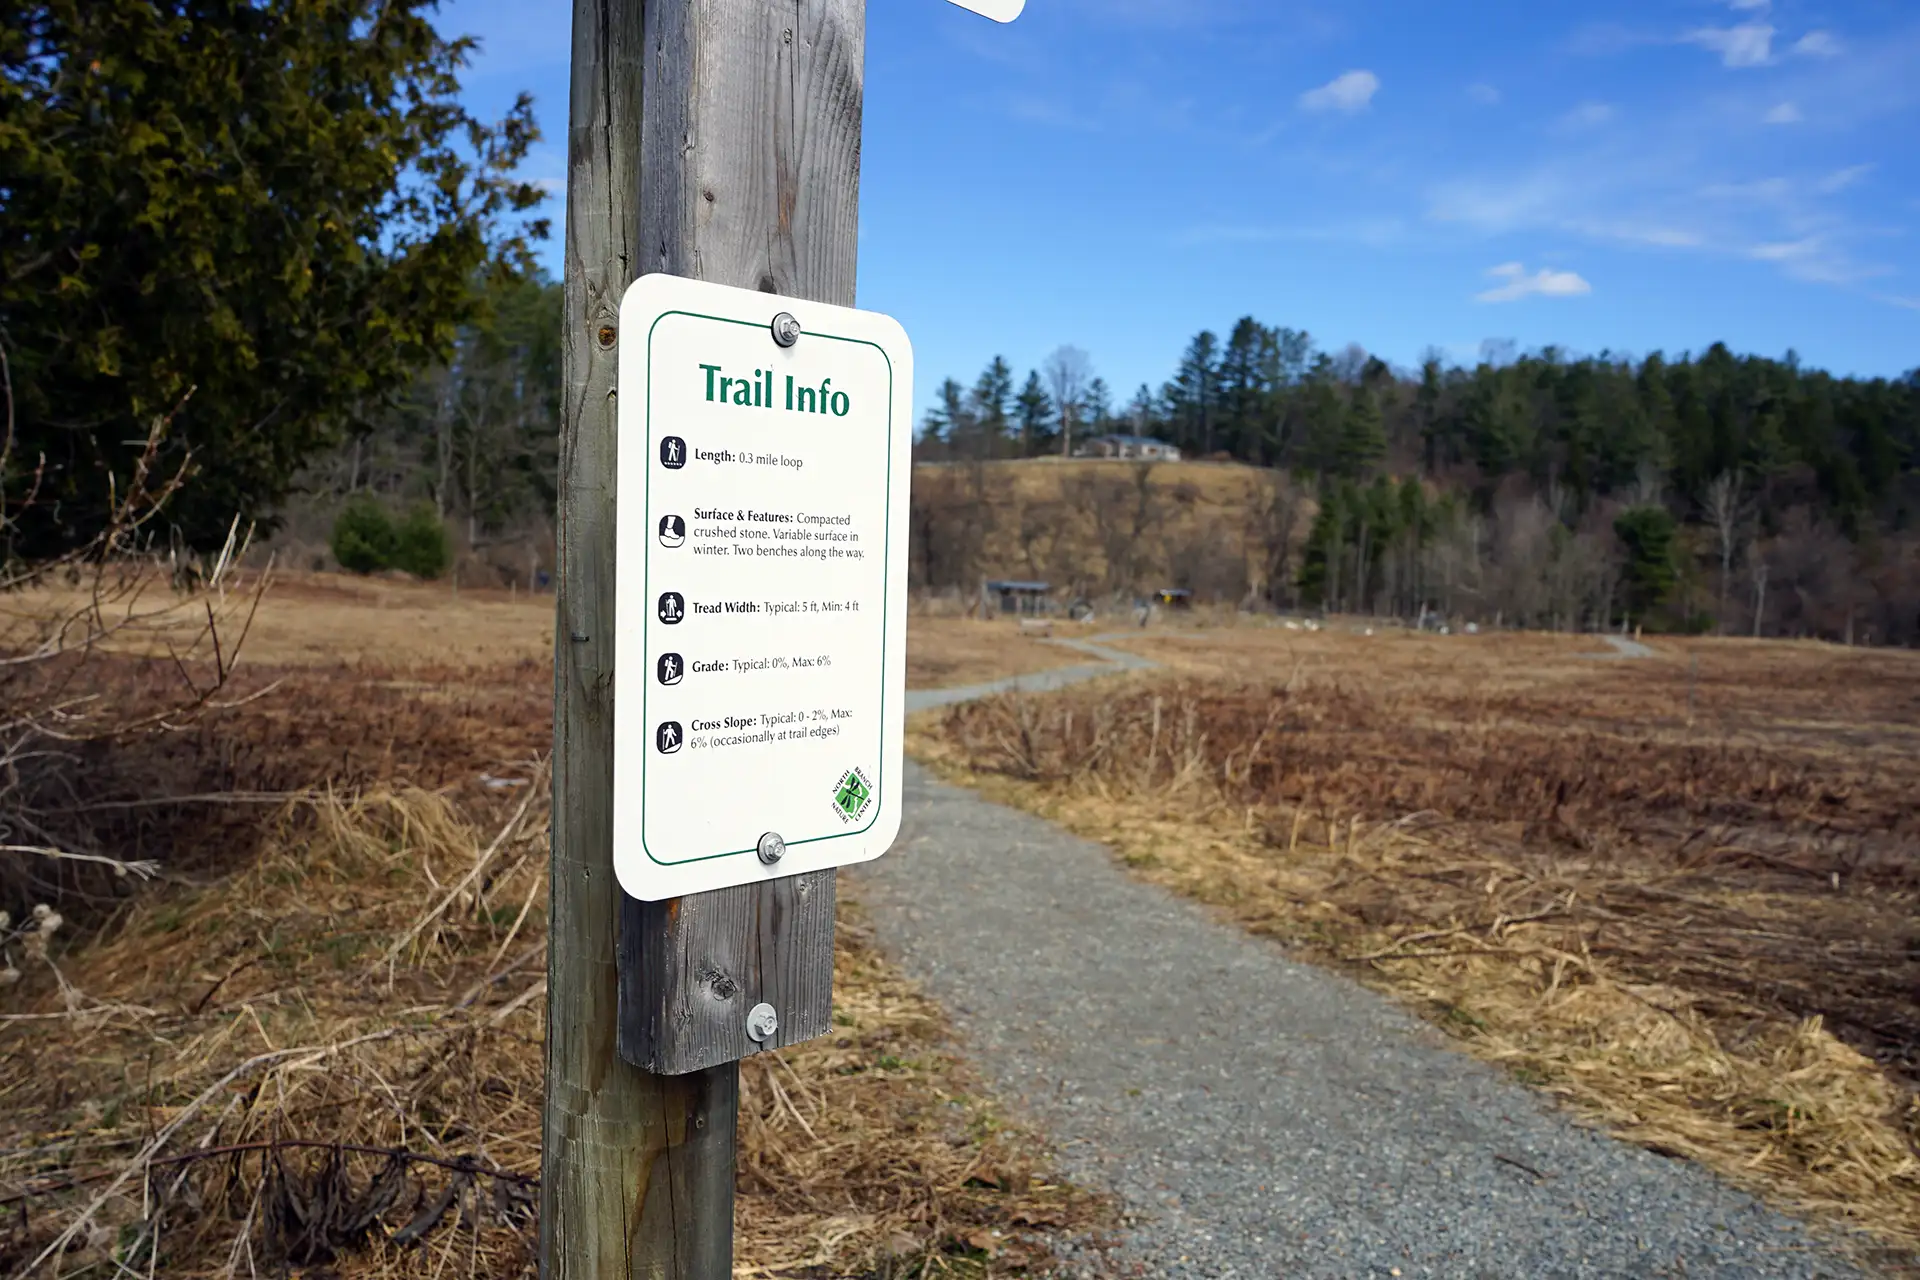
- Trailhead, Signs, and Objects
- Trailhead information signs should be accessible and clearly readable for all users, with placement considering wheelchair users and children.
- Include information on surface type, slope, amenities, and distances including total length of trail & first point of departure.
- Ensure constructed features along the trail, such as kiosks or signs, do not protrude more than 4 inches into the path of travel between 27 and 80 inches above the ground. Natural features like tree limbs or rock ledges are exempt.
- Trailhead information signs should be accessible and clearly readable for all users, with placement considering wheelchair users and children.
- Integrate sensory-rich features: This includes audio tours, tactile signs, and interpretive stops along the trail to ensure an adequate sensory trail and enhance the nature experience for all visitors, including those with vision or cognitive differences.
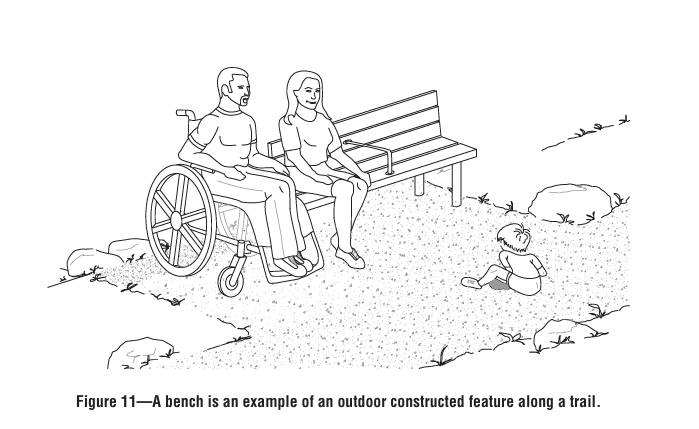
- Benches and Rest Areas
- Install benches frequently along the trail, especially before and after elevation changes.
- Accessible benches should have adjacent space for wheelchair users.
- Picnic Areas, Boardwalks, and Viewpoints
- Use extended picnic tables to allow wheelchair access.
- Safety barriers (e.g., a 6-inch curb or bumpers) at viewpoints and along boardwalks improve comfort and safety for all visitors.
- For features like boardwalks or bridges, gaps must not exceed ½ inch and should be perpendicular to the direction of travel.
- Amenities and Restrooms
- Where possible, provide accessible restrooms and firm access paths from parking to amenities.
- Consider Other Power-Driven Mobility Devices (OPDMDs)
- E-scooters, or powered trikes, may be used by individuals with disabilities on certain trails. Consider developing a simple OPDMD policy that balances access and environmental protection, in line with ADA guidance. See this example.
Tradeoffs
The accessible trail guidelines also recognize that not every location can meet the gold standard:
- Cost limitations may make full upgrades impractical.
- Environmental sensitivity (e.g., rare habitats or natural features) may justify exceptions.
- In these cases, the goal is to achieve “best possible access” and clearly communicate on-the-ground conditions to trail users so they can decide if the trail is right for them.
“There are exceptions to the rules. You can still create meaningful access for people with mobility limitations, even when you can’t meet every standard—as long as you clearly inform users about conditions.”
— Russell Hirschler, Executive Director, Upper Valley Trails Alliance (UVTA)
Recommended Resource
For a real-world example of these best practices in action, check out the Mass Audubon Accessible Trail Guide.
Refer to the quick wins section below for suggestions on how to make meaningful updates to a trail when facing limitations.
Cost Considerations
Building accessible pedestrian trails can be significantly more expensive than basic footpaths—typically 5 to 10 times more. That said, the cost shouldn’t stop you from improving access. There are practical ways to phase projects, reduce costs, and build momentum over time.
Why Costs Increase
- Higher construction standards: Grading, excavation, and surfacing all require more time and materials.
- Material costs: Crushed stone, hardpack, and geotextile fabric add to expenses.
- Trucking and transport: Remote sites often face high trucking fees for materials.
Smart Strategies to Manage Costs
- Start with the most visible section: Prioritize short loops or trail segments closest to the parking area. Early success helps build public support and future funding.
- Phase the project: Build in stages—one loop or section at a time.
- Use local resources: Coordinate with local road crews to piggyback on material hauling or site prep. This can significantly reduce trucking fees.
- Leverage volunteers: Many communities have skilled volunteers with access to equipment like mini-excavators who can help reduce labor costs.
- Choose locally available materials: Consult local quarries and road departments to find cost-effective, durable materials specific to your region.
“Our goal is not to tell you that you can’t do it—it’s to show you how you can get started within your means.”
— Russell Hirschler, Executive Director, Upper Valley Trails Alliance
Success Builds Support
Just one high-quality accessible trail section within a trail or system can:
- Increase community use
- Diversify trail users
- Attract future grants
- Inspire local investment in further improvements
- Attract volunteers
Don’t let upfront costs prevent you from taking the first step.
Quick Wins
Not every trail will (or should) meet the highest technical standards. But that doesn’t mean you can’t make it more usable for more people. The continuum of accessibility recognizes that small, low-cost improvements can have a big impact on many visitors.
What the Continuum Looks Like
- At one end: Fully accessible, Access Board-compliant hardpack trails with resting areas, signage, and amenities.
- At the other end: Simpler improvements that make trails easier for older adults, parents with strollers, or people recovering from injury.
Practical Improvements You Can Make:
- Smoother trail surfaces: Remove tripping hazards and stabilize loose materials.
- Resting spots: Install benches or natural seating every few hundred feet.
- Handholds or ropes: Especially on short, steeper sections to assist balance.
- Trailhead improvements: Level out short sections near parking areas for easier access to nature.
- Better signage: Add mileage markers, rest spot indicators, and wayfinding aids.
- Improved trail descriptions online and in-person: Give users accurate, clear information to plan their trip, including slopes, surfaces, and potential barriers.
“Building to the standard doesn’t guarantee it works for everyone. The best thing you can do is clearly explain trail conditions and let people decide.” — Russell Hirschler, Executive Director, Upper Valley Trails Alliance
When full accessibility isn’t possible, the goal is to do what you can, where you can, while being upfront about what users can expect.
Build With, Not For
One of the most important principles when trail building is to engage stakeholders from the very beginning. Early in the project development, bring people into the project who have an interest or concerns. This includes disabilities advocates, landowners, land trusts and conservation commissions, schools, health officials, etc.
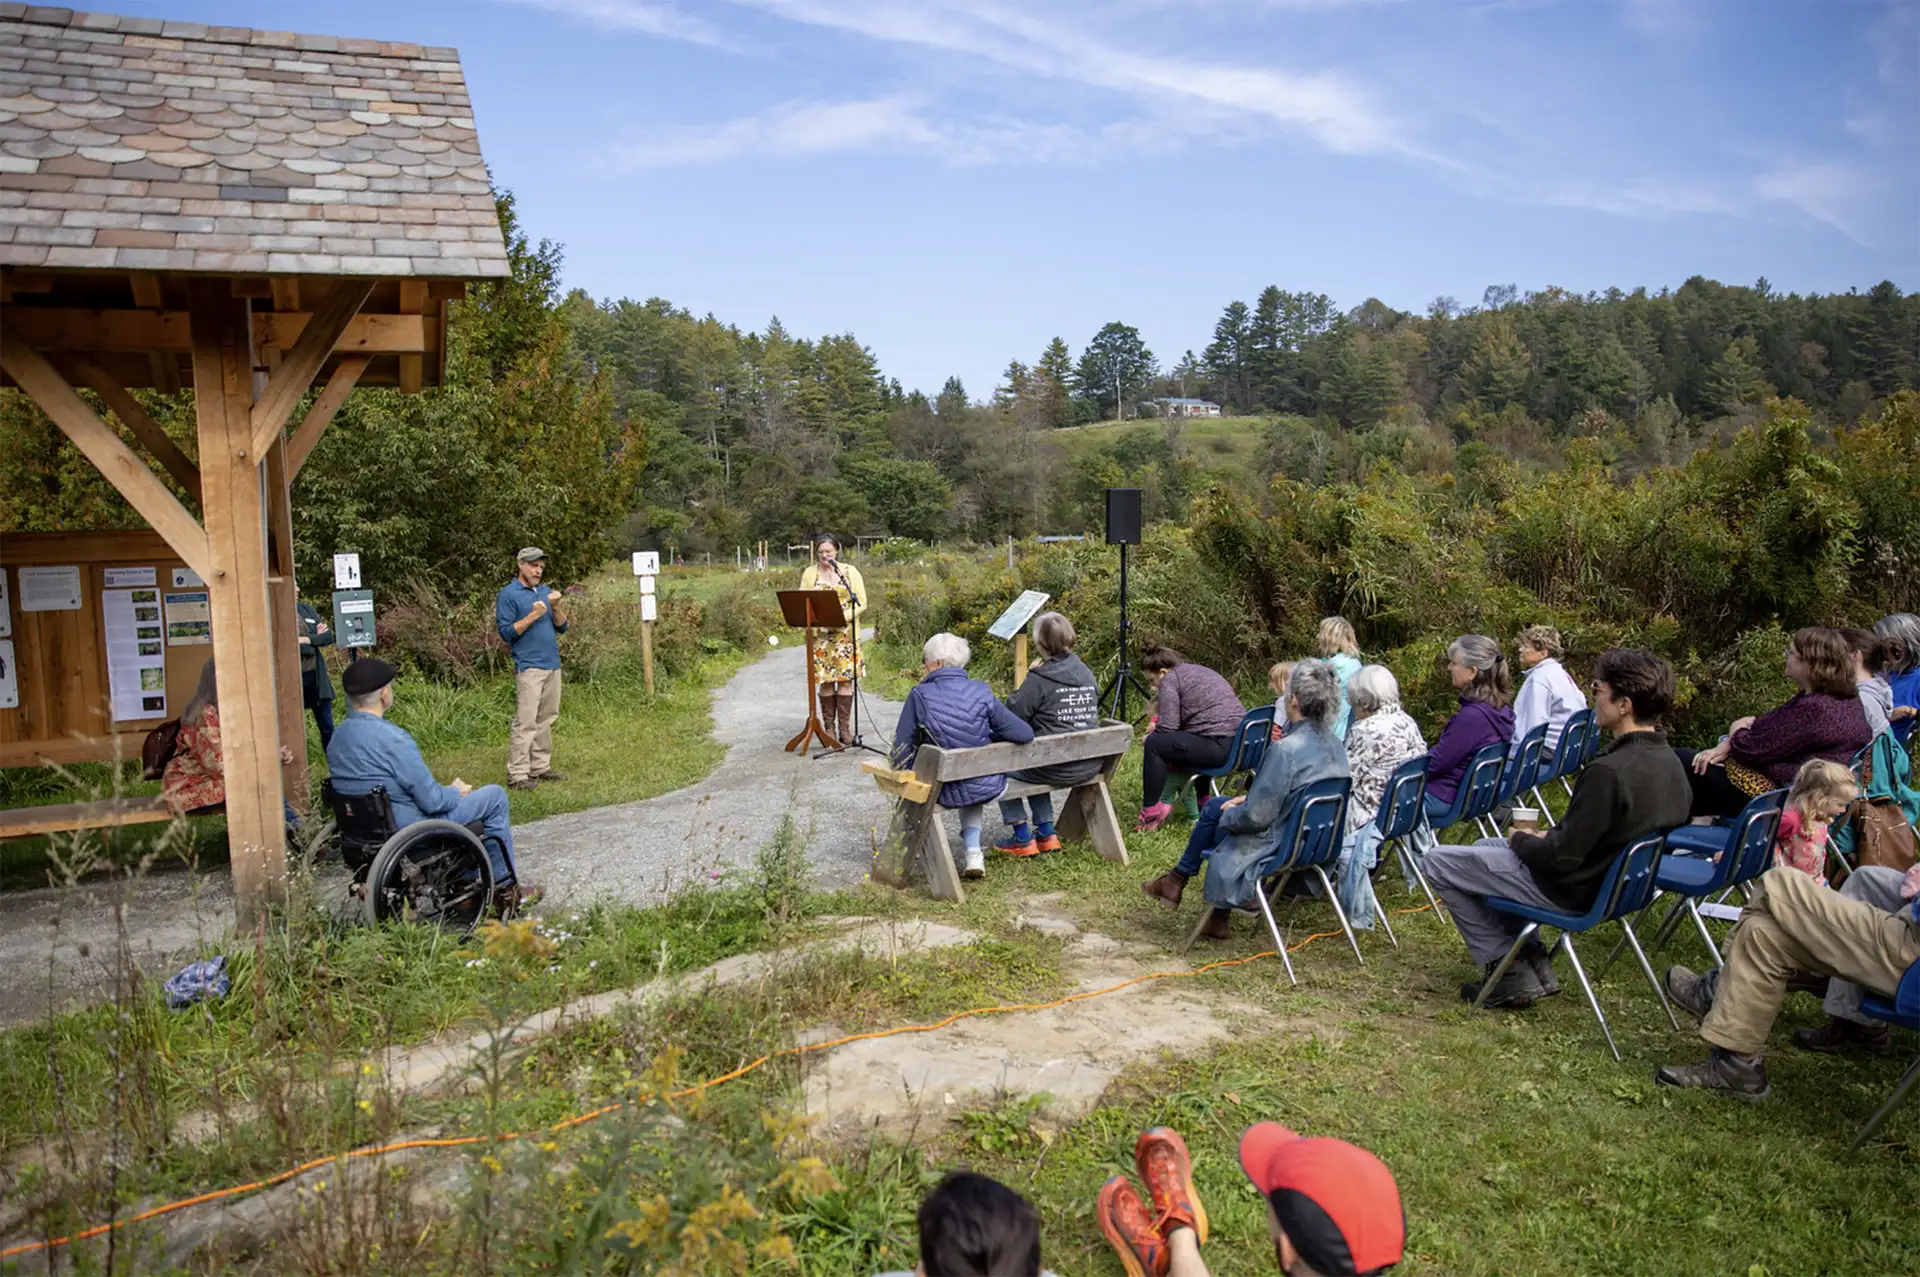
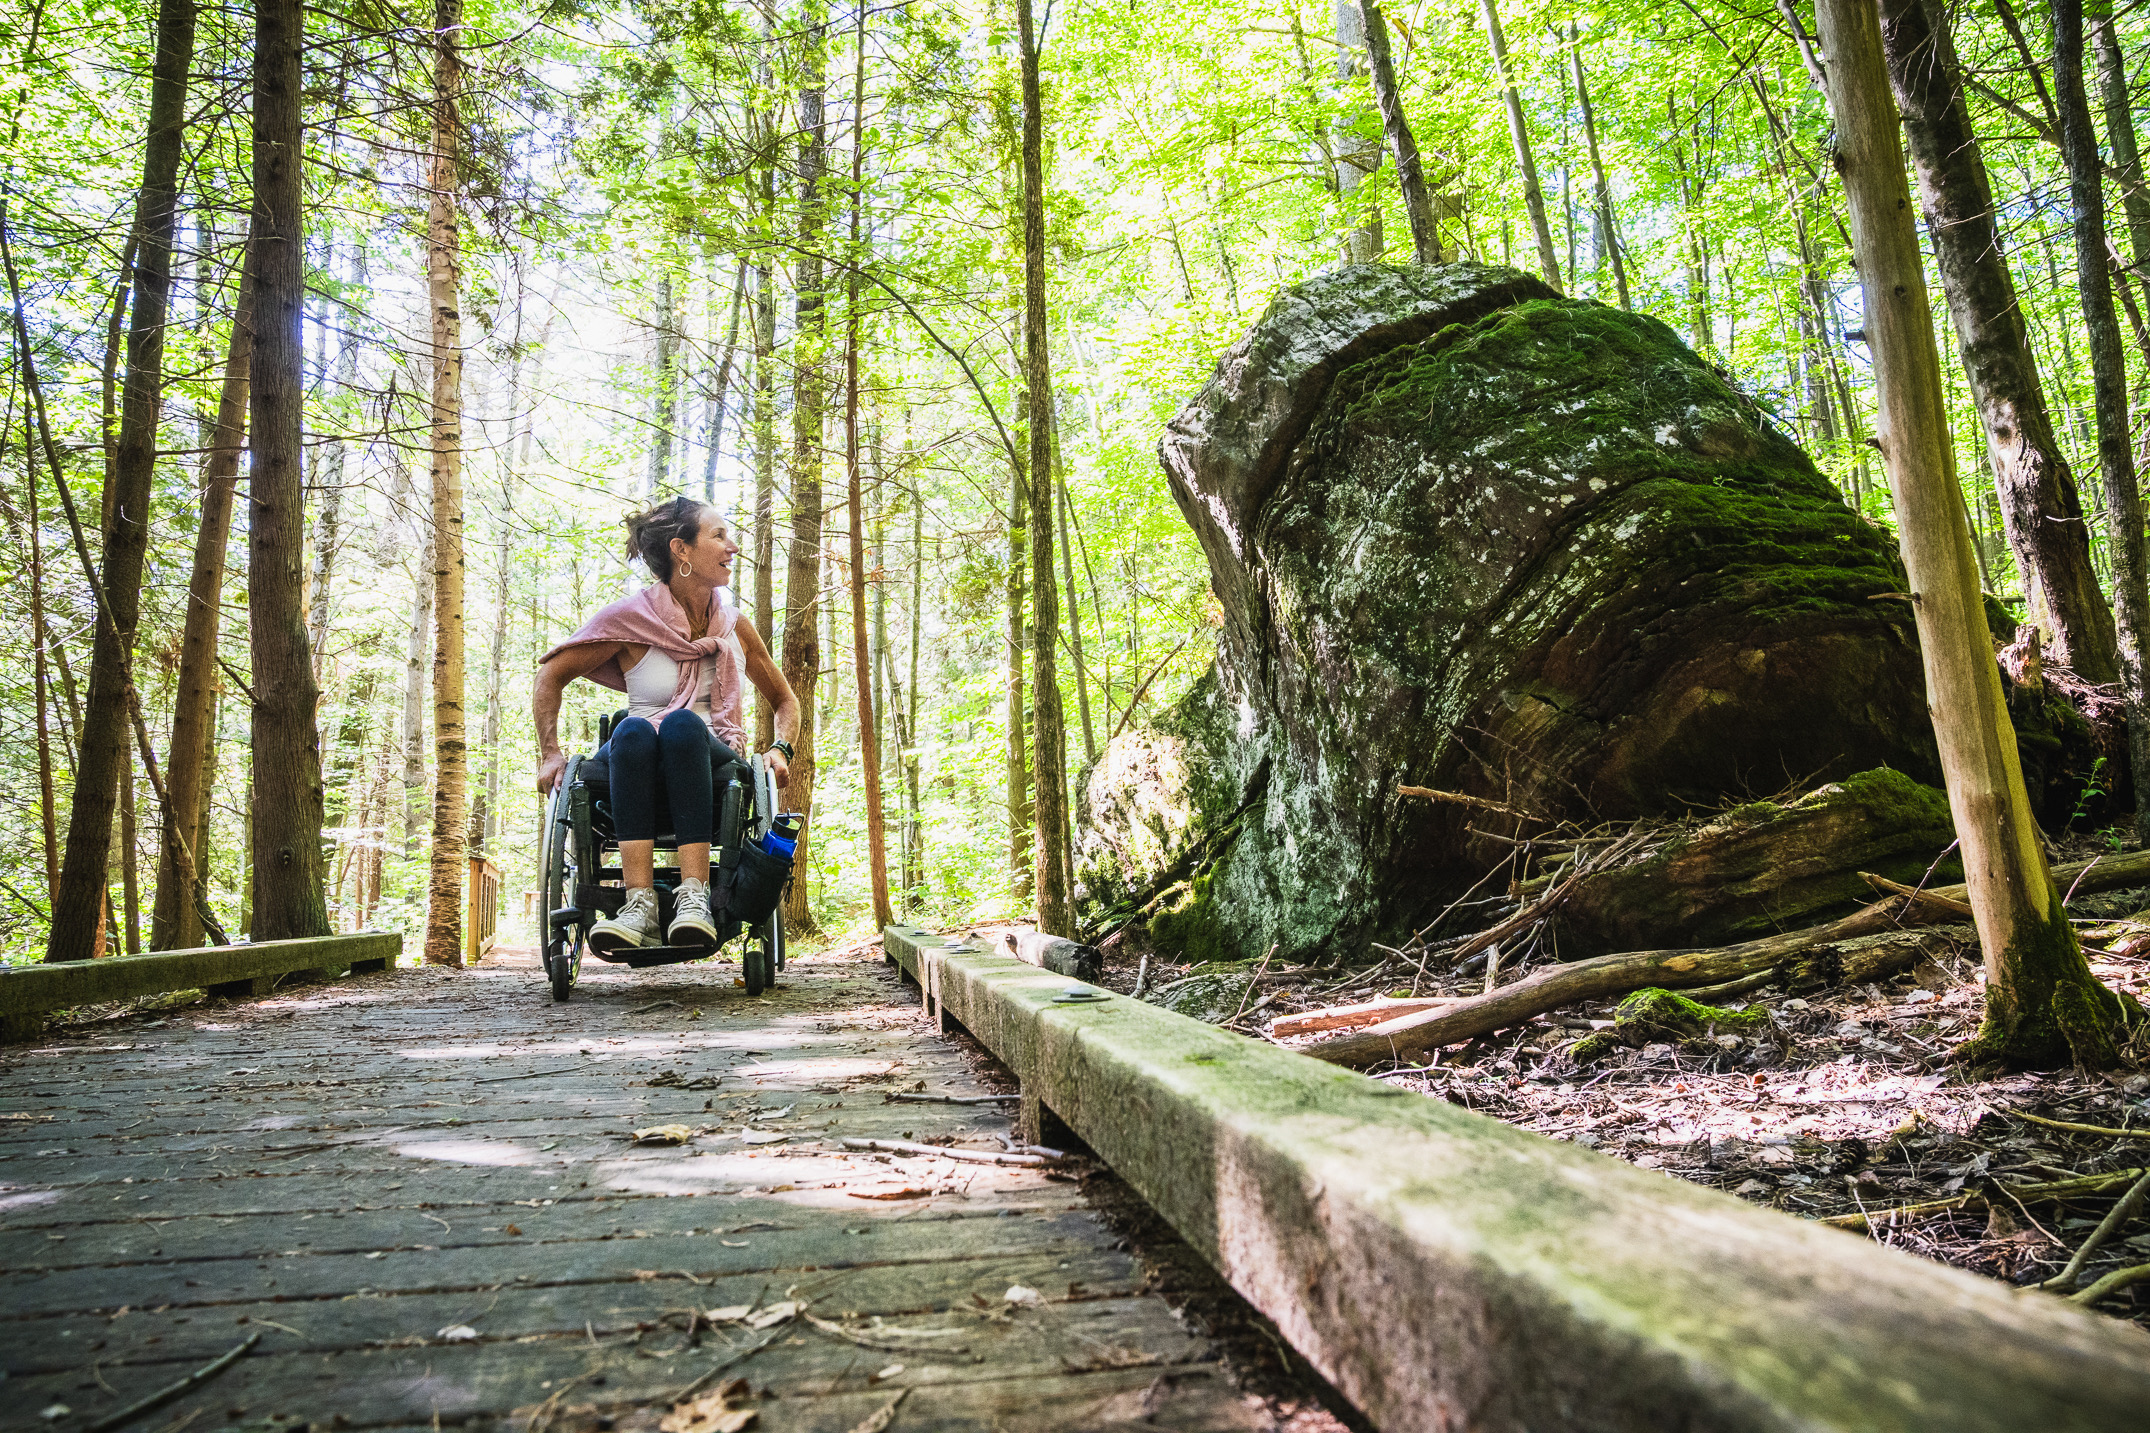
When building accessible trails, it is critically important to build with people with disabilities, not just for them. The trail will be better built, have more funders and volunteers, and be used more if people with disabilities are equal partners.
The best way to figure out what’s needed? Walk the trail with someone who uses a wheelchair or other mobility aid—they’ll spot barriers you might not notice.
Why It Matters
- Lived experience helps identify access barriers and overlooked features in existing trails, and helps identify what new trails would be most appreciated or used, easiest to access, etc.
- Inclusive design leads to better, more practical trail improvements
- Community input builds ownership and local support, including funding.
Recap: Ways to Build With, Not For
- Invite people with disabilities to site visits and planning meetings
- Do trail walk-throughs with people using wheelchairs, walkers, or strollers
- Ask for feedback on trailhead design, rest spots, and signage placement
- Collaborate with local disability organizations or adaptive sports programs
- Maintain a feedback loop after trail construction and invite users back to test and give input on trail performance over time, helping guide future improvements.
The result: trails that actually work for real people, not just checkboxes on a compliance form.
Considerations for People with Neurodivergence
Trails designed with neurodivergent users in mind, including individuals on the autism spectrum, can dramatically improve both accessibility and the nature experience for all visitors.
Special Design Features
- Sensory-friendly routing: Spaces or “alone zones” where visitors can pause, decompress, and self-regulate
- Predictable pathways: Consistent surfaces and gentle transitions reduce anxiety
- Video preview: Add to the trail website a video walk-through of the start of the trail and key points so visitors know what to expect.
- Interactive stations: Incorporate tactile, auditory, and visual elements (e.g., music zones, textures, natural play areas)
- Wayfinding support: Visual markers and signposts—like the ANT’s stacked-stone markers—help reduce disorientation
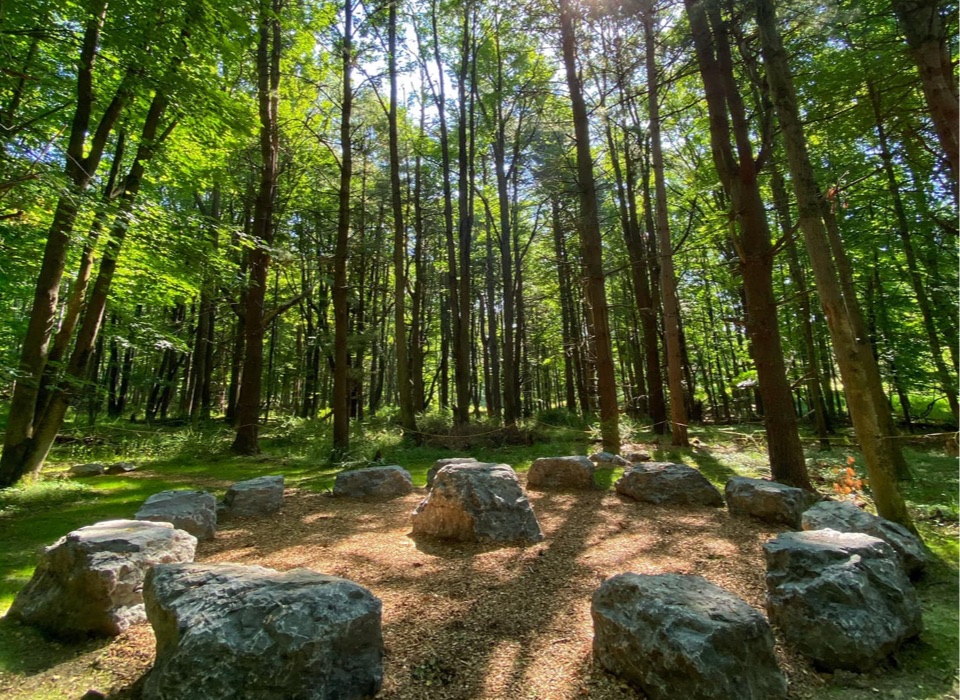
Spotlight: Autism Nature Trail (Letchworth State Park, NY)
Designed in consultation with Dr. Temple Grandin, an American scientist and industrial designer, it is a sensory trail intended to serve all guests—not just those with autism. Highlights include:
- One-mile loop with ADA-compliant, stone-dust hardpack surface (~6 ft wide). There are 38 stone markers (“vertical ants”) visible at all times.
- Eight interactive sensory stations, including music areas, reflection knolls, and “playful paths” with diverse textures.
- Includes “alone zones” for quiet time and safety cut-throughs if a path becomes overwhelming.
Considerations for People Who Are Blind or Have Low Vision
Accessible trails for people with vision loss rely on tactile and auditory wayfinding along with clear standards to navigate safely and independently.
Design Elements to Include
- Raised guide rails or ropes along the path
- Tactile indicators at trailheads, intersections, and decision points
- Braille and raised-text signage, positioned at accessible heights
- Audio wayfinding cues, such as QR codes linked to recorded narratives or smartphone apps
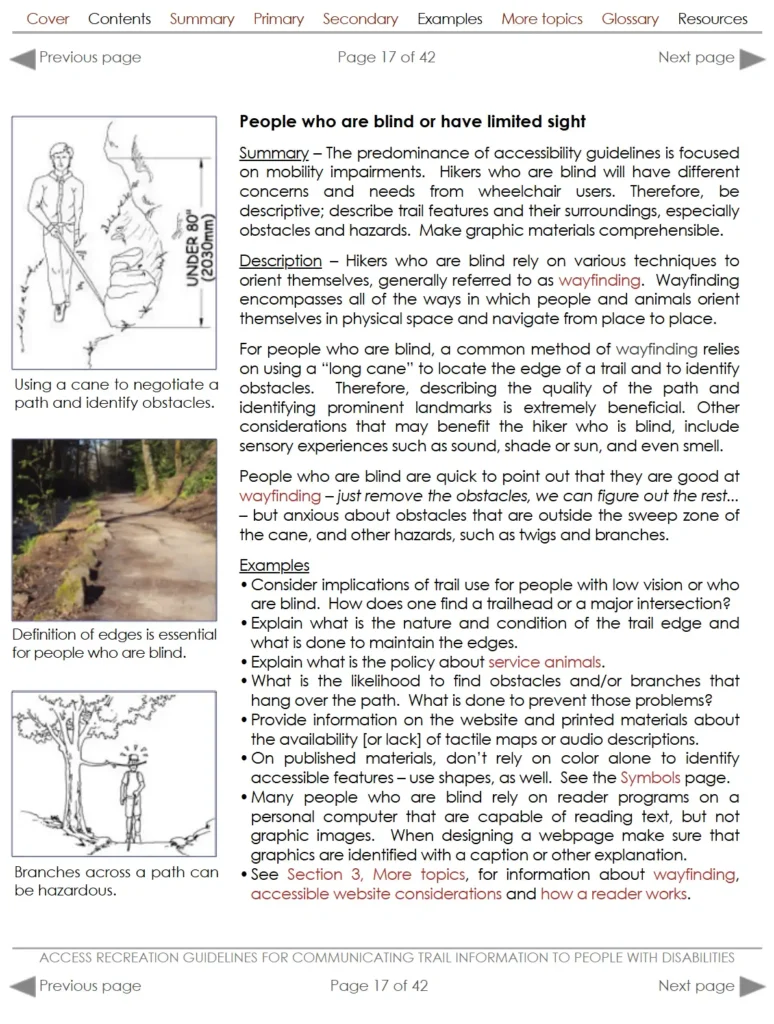
Recommended Resource
Access Recreation’s guidelines for blind & visually impaired trails offers clear, step-by-step specs
Birdability
Birdability focuses on making birdwatching easier for everyone, regardless of mobility, vision, or other physical limitations. Thoughtful trail design not only improves access to nature but also ensures that birding hotspots are welcoming and usable for a wider range of people.
What to Consider for Bird-Friendly Accessible Trails
- Location: Prioritize accessible trails near wetlands, ponds, and meadows—habitats with rich bird activity.
- Trail Design: Use hardpack or boardwalk surfaces that provide smooth, stable footing for wheelchairs and walkers.
- Viewpoints and Bird Blinds:
- Ensure bird blinds are accessible with level entry points
- Viewing openings should be usable from seated and standing heights
- Signage: Add visual and auditory birding guides (QR codes for audio guides, tactile signs, or simple ID guides).
- Benches and Rest Areas: Offer frequent spots to sit and watch quietly, especially near high-activity birding areas.
- Trip Planning Info: Clearly indicate accessible birding trails on websites and printed materials.
Related Reading


Accessibility vs. Access
Access and accessibility are often used interchangeably, but they mean different things. Understanding the distinction is essential for building inclusive outdoor spaces.
FAQs
A: The Trail Accessibility Hub is a partnership of trail organizations and disabilities advocates dedicated to improving accessibility on public trails and outdoor recreation areas in Vermont for people with disabilities. The Hub was created in 2024 by Vermont Trails & Greenways Council in partnership with the Upper Valley Trails Alliance, Vermont Mountain Bike Association, Vermont Adaptive Ski and Sports, Northern Forest Canoe Trail and Trail Finder. VTGS hosts web–based resources that educate trail managers and support trail users. Together, the partnership hosts networking opportunities that connect partners and trail users to accessible trail design and maintenance information, trail grants and funding sources; provide trail assessments and more. Initially funded by the Vermont Outdoor Recreation Economic Collaborative (VOREC) Community Grant Program, the TAH is now seeking funding to continue in ‘26 and beyond.
