Adaptive Mountain Biking: Accessible Guidelines
Photo credit: Sevenpair Studios

A guide for trail builders, managers, volunteers, and riders
Mountain biking can be made more inclusive when trails are designed with adaptive riders in mind. Building adaptive-optimized trails takes collaboration, expertise, and attention to design details that make riding safe, fun, and usable for more people.This page is built around a 3-part video series developed with adaptive riders, professional builders, land managers, and Vermont trail organizations. Together, they share what it takes to create trails that welcome more riders.
Episode 1: Foundations
Intro & Overview: How and Why to Build Adaptive Trails
- Adaptive mountain biking is growing. About 10% of Vermont’s 1,000 miles of MTB trails have already been built or retrofitted to be adaptive-friendly or adaptive-optimized.
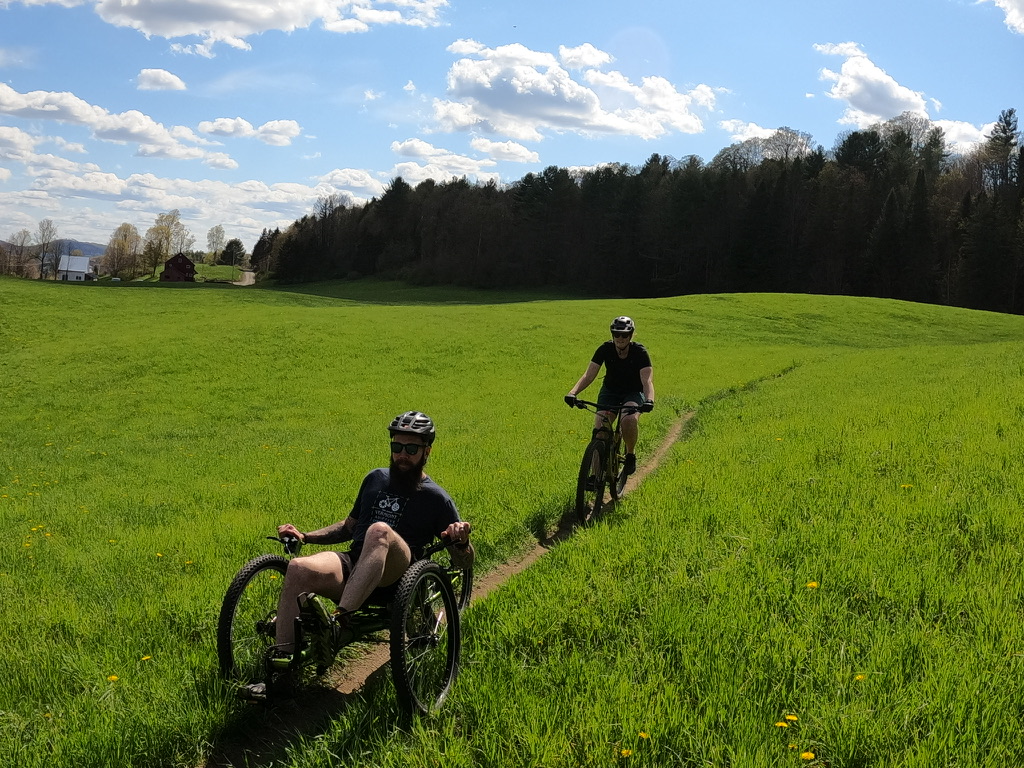
- Adaptive bikes vary widely. Riders may use hand cycles, pedal-assist, or fully electric setups. Trail design must account for different widths, wheelbases, and sightlines.
- Two categories of trails:
- Adaptive-friendly — passable by adaptive bikes, enjoyable, and free of major hazards.
- Adaptive-optimized — designed for smooth flow, good sightlines, minimized tipping hazards, and an intuitive ride experience.
- Six design principles to evaluate a trail:
- Width – at least 40” wide to fit adaptive bikes (up to 38” wide).
- Turning Radius – wide, gradual turns for long wheelbases.
- Outslope/Camber – avoid off-camber tread and obstacles on inslope.
- Sight Lines – riders sit lower, need clear view into features.
- Obstacles – roots/rocks; greater than a few inches high block side-by-side wheels.
- Fall Consequence – minimize high-risk fall zones; test with adaptive riders.
- Trailheads matter. Accessible parking, bathrooms, and signage make networks welcoming and usable.
- Consistent signage builds inclusion. If a trail is rated blue, it should be blue for everyone. Black trails should be signed black for everyone too — adaptive riders don’t need a separate system.
- Flow is critical. Adaptive riders should experience the same trail rhythm as two-wheel riders, without being forced to slow in places others don’t.
- Networks are better than single trails. Connected loops and routes make adaptive riders feel fully included in a trail system.
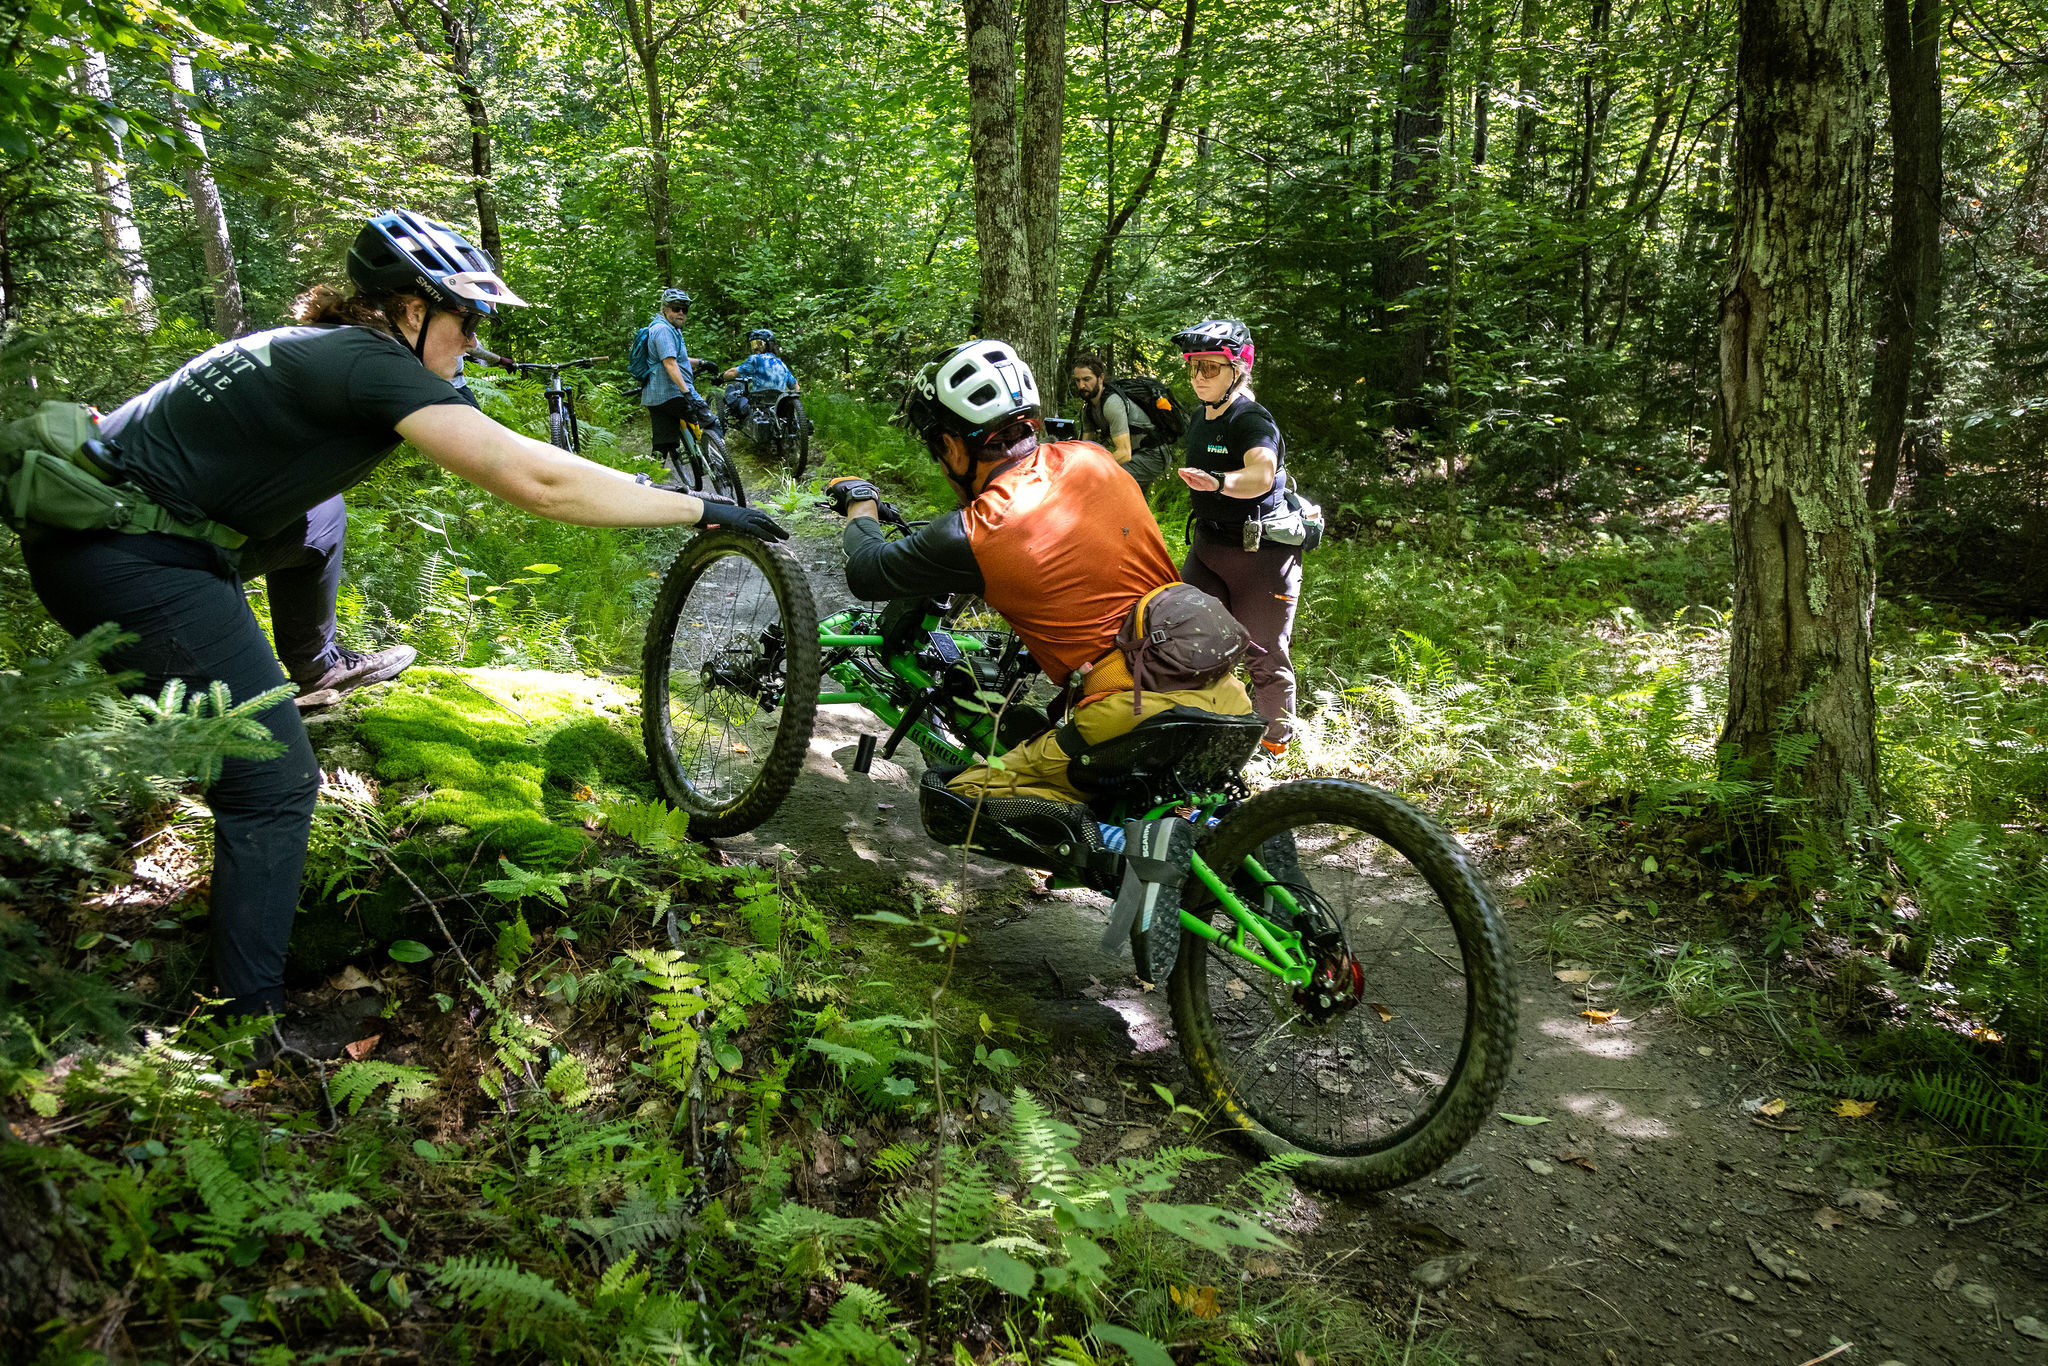
- Assessment and vetting are essential. Work with adaptive riders and professionals during planning, construction, and retrofits. Don’t wait until trails are finished — add contract clauses that require adaptive testing during the build.
“Adaptive mountain bike trails are trails suitable for everyone. They can be green, blue, black, and double back. They can be steep or flat. They can be pedal access or lift access. Adaptive mountain bikes are for people who want the thrill of trail riding. They can also be a mobility device that lets people with different physical abilities access nature.”
—Greg Durso, Senior Director, Kelly Brush Foundation
Episode 2: Flat & Climbing Trails
Best Practices for Flat and Climbing Trails
- Climbing is demanding. The experience depends on the bike setup (front- or rear-wheel drive, manual or e-assist), but all adaptive riders need trails that limit unnecessary hazards. Trails shouldn’t be “dumbed down,” but they must account for bike limitations.
- Surface matters. Avoid loose gravel, mud holes, or slick rock that can’t be navigated if a rider is strapped into their bike.
- Obstacles add character but must be passable. Roots, rocks, and other features should be rideable at speed without stopping or tipping adaptive bikes.
- Outslope is a hazard. While outslope helps shed water, adaptive bikes are more sensitive to tilt. Keep outslope minimal, and avoid it entirely on corners.
- Climbing corners. Design corners with a 15–20 ft radius, larger than an adaptive bike’s turning radius, to reduce tip-over risks at vulnerable points.
- Rest spots. Pull-offs should be at least 4 ft wide, ideally larger, to allow multiple adaptive riders to rest.
- Bridges. Minimum 42″ wide; 48″ preferred (especially where there are drop-offs or multiple angles). Add curbing on bridges with side exposure. Wider bridges also allow medevac and excavator access.
- Grades. Similar to two-wheel bikes; the main issue is erosion control.
- Fall consequences. Exposure matters more than tipping itself. A grassy fall zone may be fine; a steep embankment is not. If there are technical obstacles on a climb, make sure they are passable.
- Pinch points. Avoid narrow trees, boulders, or roots that block passage — adaptive riders can’t always dismount and walk around.
- Test with real riders. Designs are only theory until adaptive riders on different equipment ride the trail. Testing during the build phase prevents costly mistakes.
“Adaptive trails don’t need to be easy or dumbed down, but they do need to be built to consider the abilities and limitations of adaptive bikes.”
—Greg Durso, Senior Director, Kelly Brush Foundation
Episode 3: Descending Trails
Best Practices for Descending Trails
- Sightlines from a lower perspective. Adaptive riders sit lower to the ground; trails should provide long, clear sightlines to avoid surprises. Blind drops, hidden corners, or sudden obstacles can cause crashes.
- Flow is everything. Keep corners open and long, avoid bottlenecks, and design pull-off areas so riders can safely pass or regroup.
- Water management needs extra care. Outslope that works for two-wheel bikes can pull adaptive bikes off-trail. Use alternative drainage (inslope, culverts, rock armoring) and avoid excessive tilt in turns.
- Fall consequences. Exposure matters. Grassy run-outs are manageable; steep embankments or high camber can be dangerous. Remove or lower obstacles that create tipping hazards on a high camber.
- Bridges. Minimum 42” wide; 48”+ preferred. Consider curbing or railings if elevated, and design smooth entries that maintain rider flow and speed.
- Steep terrain. Adaptive bikes can handle it, but erosion control (rock armoring, short fall-line sections only) is critical.
- Corners and berms. Lengthen the “tail” of berms and the end of corners to help adaptive bikes carry momentum without blowing out. Smooth backslopes and downslope areas to allow different lines.
- Jumps. Approaches must be predictable, consistent, and visible; avoid blind or unsettling features before the lip.
- Always test with adaptive riders. Seated perspective and handling are very different than on two wheels. On-the-ground testing is the only way to confirm safety and flow.
- Progression builds inclusion. Networks should offer trails that allow all riders to advance their skills, with options that challenge without excluding.
“Progression is one of the most important things you can do when building adaptive mountain bike trails. You want a network where everyone has a chance to get better.”
—Greg Durso, Senior Director, Kelly Brush Foundation
Quick Wins
You don’t need to start from scratch to make a difference. Many existing trails can be improved to be adaptive-friendly with relatively small changes:

Photo credit: Sevenpair Studios
- Widen pinch points to at least 40 inches.
- Harden surfaces with crushed stone or soil stabilizers.
- Recut corners to reduce awkward turning radii.
- Reduce excessive camber and improve sightlines.
Get an assessment. The best way to understand a trail’s potential is through an adaptive trail assessment. These are typically conducted with an experienced adaptive rider, a spotter, the trail manager and/or builder, and a note-taker to document needed upgrades.
- There is currently funding through the VHCB REDI program to pay for accessible mountain biking assessments.
- You can also reach out to Vermont Mountain Bike Association (VMBA), Northern Forest Canoe Trail (NFCT) and Upper Valley Trail Alliance (UVTA) to see if they have funding and staff available to conduct an assessment.
- Include adaptive vetting early in planning or contracts to avoid costly reroutes later.
Update trail platforms and signage: Once upgrades are complete, add accurate signage and descriptions in platforms like Trail Finder and Trail Forks so adaptive riders know what to expect.
“The main goal of adaptive trails is to provide adaptive riders the same experience as two-wheel riders.”
—Greg Durso, Senior Director, Kelly Brush Foundation
Costs
Budgeting for the construction of new aMTB-friendly trails and for the retrofitting of existing trails can vary dramatically. Many existing trails may be suitable for adaptive mountain bikes as-is, others may require minor modifications that can largely be tackled by volunteers, and some may merit comprehensive and expensive rebuilds before they can be considered adaptive-friendly.
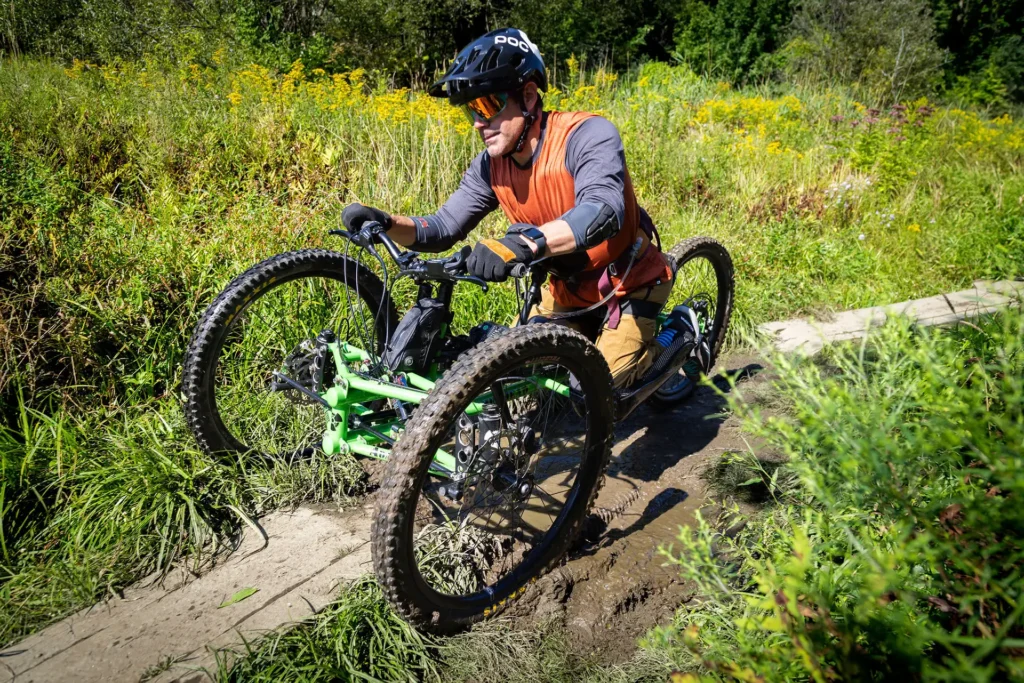
Photo credit: Sevenpair Studios
Cost drivers include:
- Pinch points: If due to natural barriers like trees or rocks, these can be simple (and cheap) to address. If resulting from long, narrow (<40”) bridges, however, costs can rapidly scale with the length and complexity of the bridge
- Tread issues: trail that is too narrowly benched or excessively outsloped can often be modified with volunteer labor or minimal machine work. However, the location and topography of the trail can make such modifications costly if retaining walls or other soil retention approaches are required.
- Turn reconstruction: turns that are either too tight or poorly shaped can be rebuilt with minimal effort, if located in flatter areas without significant constraints. When, however, terrain limits the location and design of a turn, reshaping to make aMTB-friendly can require expensive ground work and may ultimately be impractical given the slope, natural features, etc.
We strongly encourage trail managers to conduct an Adaptive Assessment, which focuses on the lowest-hanging fruit in terms of benefits relative to cost and can help prioritize investments.
Cost per square foot
In terms of the construction of a new Adaptive-Friendly and Adaptive Optimized trail, costs depend heavily on the terrain and soil type. In many easy-to-build locations with well-draining soils, gentle topography, and limited constraints, an adaptive trail may be equivalent in cost to a conventional trail, often $5-10/foot. In areas with more rock, especially ledge, and with topographical constraints, the requirement to avoid pinch points and tight, outsloped turns can cause the cost of adaptive trail construction to increase dramatically.
How to get started
A site assessment with a trail builder experienced in adaptive trail construction is highly recommended, as attempting to retrofit these trails after the fact may be cost-prohibitive.
Ultimately, not all existing trails can or should be made adaptive-friendly and not all new trails can or should be built to accommodate adaptive bikes. The quality of the experience should be weighed against the costs, environmental impacts, and consistency with the character of the overall trail system.
Build With, Not For
Building adaptive trails isn’t just about the end product — it’s about the process. The Professional Trail Builders Association “trail life cycle” (planning, design, construction, maintenance) applies here too, but with an added emphasis on collaboration and iteration.
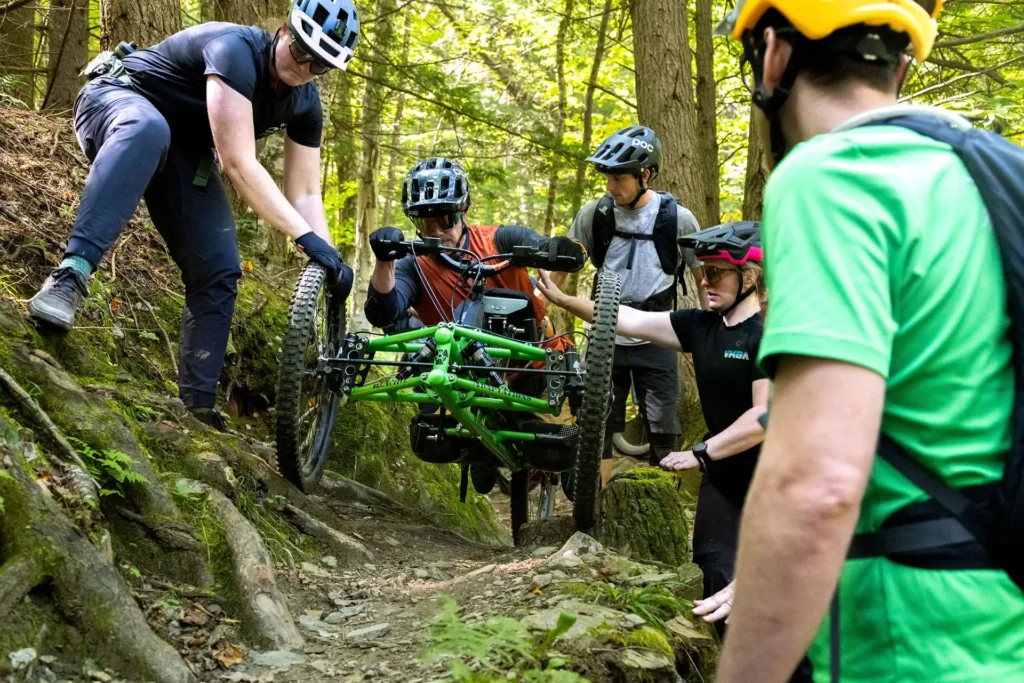
Photo credit: Sevenpair Studios
- Engage early. Involve adaptive riders, builders, and organizations like Vermont Adaptive during the planning stage to ensure designs reflect real-world needs.
- Design and prototype. Paper plans don’t always ride well. Walk-throughs and ride-throughs with adaptive bikers highlight issues like pinch points, unsafe cambers, or surfaces that won’t hold.
- Build and test. During construction, adaptive riders should be part of checking features, trail widths, and transitions before a project is finalized.
- Refine and sustain. Expect to adjust. Small tweaks — widening a turn, hardening a surface — can make a big difference. Long-term, build in feedback loops, maintenance, and opportunities for adaptive riders to lead.
Because no two adaptive riders have the same needs, variety is key. Some require smoother grades, while others want technical features. Offering multiple options — and clearly communicating what exists — gives riders the ability to choose what works for them.
Related Reading


Accessibility vs. Access
Access and accessibility are often used interchangeably, but they mean different things. Understanding the distinction is essential for building inclusive outdoor spaces.
Video Credits:
- Produced and Directed by: Berne Broudy and Scott Barber Film
- Edited by: Scott Barber Film
- With expertise from: Kelly Brush Foundation, L&D Trailworks, Richmond Mountain Trails, Vermont Adaptive Ski and Sports (VASS), and Vermont Mountain Bike Association (VMBA).
- Supported by: Best Day Ever, Bolton Valley Resort, the Vermont Trail Accessibility Hub, and the Vermont Outdoor Recreation Economic Collaborative.
FAQs
A: The Trail Accessibility Hub is a partnership of trail organizations and disabilities advocates dedicated to improving accessibility on public trails and outdoor recreation areas in Vermont for people with disabilities. The Hub was created in 2024 by Vermont Trails & Greenways Council in partnership with the Upper Valley Trails Alliance, Vermont Mountain Bike Association, Vermont Adaptive Ski and Sports, Northern Forest Canoe Trail and Trail Finder. VTGS hosts web–based resources that educate trail managers and support trail users. Together, the partnership hosts networking opportunities that connect partners and trail users to accessible trail design and maintenance information, trail grants and funding sources; provide trail assessments and more. Initially funded by the Vermont Outdoor Recreation Economic Collaborative (VOREC) Community Grant Program, the TAH is now seeking funding to continue in ‘26 and beyond.
